How to Identify and Fix a Cloud Patch on Your Laptop Screen
If you notice a "cloudy" or milky patch on your screen after a liquid spill, power down the laptop immediately and unplug all power sources. Flip the device into "Tent Mode" (an inverted V-shape) to allow gravity to pull moisture away from the delicate LCD layers. For non-liquid "clouds" (pressure marks), avoid pressing on the area, as this can permanently damage the backlight diffuser.
Discovering a cloud patch on your laptop screen can be a distressing experience, especially when you rely on the device for daily productivity. These visual defects often manifest as irregular milky smudges, bright white halos, or yellowish tints that obscure your view. While some of these issues are merely cosmetic, others signal a critical hardware failure that requires immediate intervention.
Understanding the root cause is the first step toward a successful repair. Whether the patch was caused by a spilled water bottle in a backpack or the "thermal shock" of moving between extreme temperatures, the diagnostic process remains the same. This guide provides a structured framework to help you distinguish between fixable moisture and permanent structural damage, ensuring you don't waste time on ineffective solutions.
What Should You Do the Moment You See a Cloud Patch?
The first 60 minutes after discovering a cloud patch—particularly if liquid is involved—are often referred to by technicians as the "Golden Hour." During this window, your actions determine whether the moisture remains a temporary nuisance or causes a catastrophic short circuit on the logic board.
Step 1: Immediate Power Down
Simply closing the lid or putting the laptop into sleep mode is insufficient. Sleep mode maintains a low electrical current to the RAM and other components. According to Your Phone Guy LLC , electrical flow through moisture triggers immediate electrolysis and corrosion. You must perform a hard shutdown by holding the power button until the device is completely dark.
Step 2: Peripheral and Battery Removal
Disconnect all external devices, including USB-C chargers, mice, and external drives. If your laptop has a removable battery, take it out immediately. This removes the last remaining source of potential energy that could bridge a gap between wet circuits and cause a permanent "blowout" of the display connector.
Step 3: The Tent Mode Drain
Instead of laying the laptop flat, which allows liquid to pool at the bottom of the screen assembly, place it in "Tent Mode." This involves opening the laptop and standing it up like an inverted "V." This orientation encourages moisture to migrate toward the bezel edges rather than deeper into the polarizing sheets of the LCD sandwich.
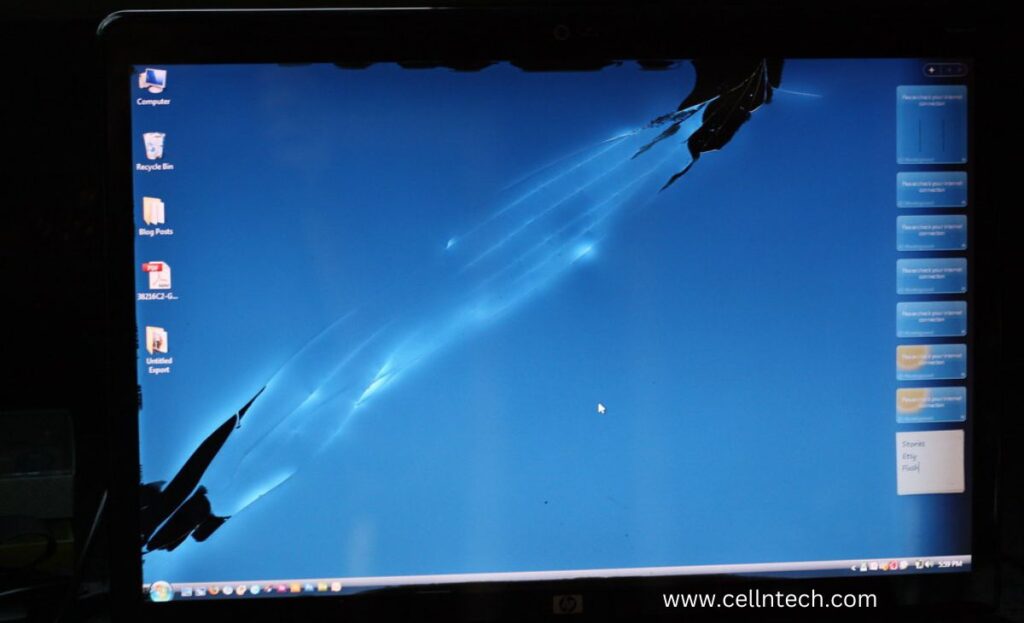
Image source: CellNtech
How to Tell if the Cloud Is Water Damage or a Pressure Mark
Not all clouds are created equal. Identifying the specific type of defect is essential because the "fix" for moisture could actually worsen a pressure mark. Use the following matrix to categorize your screen issue.
Visual Identification Matrix
| Symptom | Likely Cause | Fixability |
|---|---|---|
| Irregular "milky" edges, moves slightly when pressed. | Water/Moisture | High (if dried early) |
| Bright white "halos" or rings, fixed position. | Pressure Damage | Low (usually permanent) |
| Yellowish tint near the bottom or exhaust vents. | Heat (Delamination) | Medium (requires cooling) |
| Small clusters of red, green, or blue dots. | Stuck Pixels | High (software fix) |
The Dark Room Diagnostic
One of the most effective expert-level tricks is the "Dark Room Test." Take your laptop into a completely dark room and display a pure black image on the screen. If the cloud patch disappears, it is likely an internal light-refraction issue, such as moisture or a crushed diffuser layer. If the patch remains visible as a grey or white smudge even when the pixels are black, it is likely surface damage, such as mineral residue or a scratch on the outer coating.
The Remote Desktop Test
To rule out software or GPU failure, log into your laptop from another device using a remote desktop application. If the cloud patch does not appear on the remote device's screen, you have confirmed that the issue is 100% physical hardware within the LCD panel. If the cloud is visible on the remote screen, the problem lies with your graphics driver or GPU hardware, not the screen itself.
Why Does My Laptop Screen Look Cloudy Without a Spill?
It is a common misconception that clouding only occurs after a spill. In reality, environmental factors and physical stress are frequently to blame for "Mura" (the technical term for clouding or non-uniformity in displays).
The Thermal Shock Phenomenon
Moving a laptop from a cold environment (like a car in winter) into a warm, humid office can cause internal condensation. This happens because the air trapped between the polarizing sheets of the LCD reaches its dew point, forming microscopic water droplets. This "thermal shock" creates a cloudy appearance that may take hours or days to evaporate naturally.
The Backpack Pressure Trap
Many users experience clouding after carrying their laptop in a tightly packed bag. When a heavy textbook or charger presses against the laptop chassis, it causes the lid to flex. This forces the keyboard keys against the screen, crushing the delicate "diffuser" layer. This layer is responsible for spreading backlight evenly; once it is compressed, it creates permanent bright spots or "cloudy rings."
Aging Adhesives and Delamination
In older laptops, the factory glues that hold the various layers of the LCD together can begin to break down. This process, known as delamination, allows air gaps to form. These gaps scatter light differently than the surrounding areas, resulting in a yellowish or cloudy patch that often starts at the corners of the display.
Image source: YouTube
Safe Ways to Remove Moisture from Under Your Screen
If you have confirmed that the cloud is moisture-based, patience is your most valuable tool. Attempting to rush the process with high heat can turn a fixable problem into a permanent ruin.
The Silica Gel Chamber
While many people suggest using rice, silica gel is a much better choice. Rice introduces starch dust that can find its way into the screen layers, creating permanent "specks." Instead, place your laptop in a large, airtight plastic bin with 10–20 large silica gel packets. Seal the bin and leave it for 24 to 48 hours. The silica will actively pull moisture out of the air, encouraging the water inside the screen to evaporate.
The Controlled Airflow Strategy
If you don't have silica gel, a low-power fan is a safe alternative. Position the fan so it blows air across the keyboard and the bottom vents of the laptop while it is in tent mode. This constant movement of air prevents humidity from building up around the device, facilitating faster evaporation without the risks associated with heat.
How to Clean Mineral Residue and Etched Clouds
Sometimes the water evaporates but leaves behind "ghost" spots. These are mineral deposits (calcium, magnesium, or salts) left behind by tap water. If these minerals are on the internal layers, they are nearly impossible to remove without professional disassembly. However, if they are on the surface, they can be neutralized.
The 50/50 Vinegar Solution
Distilled water and white vinegar are highly effective for removing mineral etching. Mix them in a 1:1 ratio. Dampen a microfiber cloth—never spray the screen directly—and wipe in straight, vertical lines. Avoid circular rubbing, as this can trap grit and create micro-scratches in the screen's anti-reflective coating.
Microfiber Technique
Always use a clean, high-quality microfiber cloth. Paper towels or tissues are too abrasive and can leave behind lint that looks like new "clouds." If the spots persist, they may be "etched" into the plastic polarizer, in which case the damage is structural.
Can You Fix Pressure Marks or Bright White Spots?
Pressure marks are structural changes to the backlight diffuser. Unlike moisture, which can evaporate, a crushed diffuser cannot be "un-crushed." However, some community-driven techniques rank among the top choices for mitigating the appearance of these spots.
The Pixel Massage Technique
For minor pressure spots, you can try "massaging" the area. Wrap a soft cloth around a blunt tool, like a clean pencil eraser. With the screen turned on, apply very gentle pressure to the edges of the white spot and move toward the center. In some cases, this can help redistribute the liquid crystal or "unstick" a compressed layer. Warning: Excessive force will crack the glass.
The Suction Cup Method
This is a risky but notably innovative fix for "Mura" where the layers have separated. Using a small, high-quality suction cup (like those used for phone repair), you can gently pull the screen layer outward. This can sometimes snap a displaced diffuser back into its original position, though it is rarely a permanent fix for severe damage.
When Is It Time to Replace the LCD Panel?
At some point, the cost of repair or the level of distraction makes a replacement necessary. Consider the following factors before making a decision:
- The Spread Test: If the cloud is growing or turning black (leaking liquid crystal), the panel is failing and will eventually become unusable.
- Cost-Benefit Analysis: A replacement LCD panel typically costs between $150 and $300. If your laptop is more than four years old, this may be 50% of the device's total value.
- The External Monitor Workaround: If the laptop stays on your desk, using an external monitor is a top-tier way to bypass the screen issue entirely without spending money on repairs.
- Warranty Check: Most manufacturers consider "Mura" a defect only if it appears within the first year and shows no signs of physical impact. Check your coverage before attempting any DIY fixes.

Image source: YouTube
Key Takeaways for Fixing Screen Clouds
- Act fast: Power down and use "Tent Mode" immediately if liquid is suspected to prevent permanent corrosion.
- Diagnose correctly: Use the "Dark Room Test" to determine if the issue is internal (light refraction) or external (residue).
- Avoid high heat: Never exceed 45°C (113°F) when drying a screen to prevent the adhesives from melting.
- Use silica, not rice: Silica gel is a top-rated desiccant that avoids the dust and starch contamination associated with rice.
- Check for pressure: If you carry your laptop in a backpack, ensure there is no direct pressure on the lid to avoid "Mura" spots.
- Neutralize minerals: Use a 50/50 distilled water and vinegar solution for surface-level mineral spots.
- Know when to quit: If the cloud is turning black or spreading, the LCD panel likely needs a full replacement.
If your screen remains cloudy after 48 hours of drying, consult a certified technician to evaluate the internal display layers for permanent mineral etching.
Frequently Asked Questions
Will a cloud patch on my screen go away on its own?
This depends entirely on the cause. If the patch is caused by pure moisture or condensation (thermal shock), it will often disappear once the water evaporates, which can take anywhere from 24 hours to a week. However, if the patch is a pressure mark or mineral residue left behind after drying, it is generally permanent and will not go away without physical intervention or part replacement.
Can I use a hairdryer to dry my laptop screen?
No, using a hairdryer is highly discouraged. Hairdryers provide uncontrolled, localized heat that can easily exceed the 45°C safety threshold, leading to the melting of the polarizing film or the bubbling of internal adhesives. Additionally, the high-velocity air can blow dust and debris into the gaps between the screen layers, creating new permanent defects.
Is rice good for a wet laptop screen?
While rice is a common "home remedy," it is not recommended for modern electronics. Rice is relatively inefficient at pulling moisture out of sealed components compared to silica gel. More importantly, rice contains fine starch dust that can enter the laptop's chassis and screen layers, potentially causing more harm than the water itself. Silica gel packets are a much safer and more effective alternative.
Why are there bright white spots on my screen when I look at a white background?
These are typically pressure marks. They occur when the backlight diffuser—a layer designed to spread light evenly—is compressed or damaged. Because this layer is now closer to the light source or has changed its refractive properties, it allows more light to pass through in that specific spot. These are most visible on white backgrounds because the pixels are "open," allowing the maximum amount of light to reach your eyes.
Can cold weather cause screen clouding?
Yes, cold weather is a frequent cause of "thermal shock" condensation. When a cold laptop is brought into a warm room, the moisture in the air condenses on the cold internal surfaces, including the layers of the LCD. To prevent this, allow your laptop to warm up to room temperature inside its bag before turning it on after being in the cold.
-
Topic: How do I get the water out of my laptop screen?https://www.reddit.com/r/laptops/comments/1kd8ow3/how_do_i_get_the_water_out_of_my_laptop_screen/
-
Topic: How to Remove a Cloud Water Patch Inside the Laptop ...https://yourphoneguyllc.com/blog/how-to-remove-a-cloud-water-patch-inside-the-laptop-screen
-
Topic: Solved! - laptop screen cloudy or stains ?https://forums.tomsguide.com/threads/laptop-screen-cloudy-or-stains.127599/

How to Identify and Fix Different Types of Spots on Your Laptop Screen
Identify white pressure marks, dead pixels, or LCD leaks. Learn which spots are fixable and when to seek professional repair for your laptop screen.


How to Identify and Repair a Dead Pixel on Your Laptop Screen
Fix stuck or dead pixels on your laptop screen with software, pressure, and warranty tips. Expert DIY repair guide for all display types.


How to Identify and Fix White Spots on Your Display Screen
Identify and fix white spots on laptops, TVs, and phones. Use our diagnostic flowchart to find causes like pressure marks or stuck pixels.