How to Fix the Alert! TPM Device is not Detected Error on Dell PCs
If you see the "Alert! TPM device is not detected" error on a Dell computer, it usually indicates a temporary communication failure between the motherboard and the security chip. To resolve this immediately, perform a Hard Reset : shut down the PC, unplug the power cable, and hold the power button for 60 seconds to discharge static electricity. If the error persists, check the BIOS settings to ensure Intel PTT or TPM 2.0 is enabled under the Security tab.
Seeing a black screen with a cryptic security alert is a jarring experience for any Dell user. This specific error message—"Alert! TPM device is not detected"—is a signature notification found on Dell Latitude, Optiplex, Precision, and XPS systems. It occurs during the Power-On Self-Test (POST) when the BIOS fails to find the Trusted Platform Module (TPM), a critical component for Windows 11 security and BitLocker encryption.
When this alert appears, you are typically presented with three options: F1 to Continue , F2 for Setup , or F5 for Diagnostics . While pressing F1 might allow you to reach the desktop, you may soon find yourself locked out by BitLocker or unable to use Windows Hello features. Understanding why this happens and how to restore the handshake between your hardware and software is essential for maintaining a stable system.
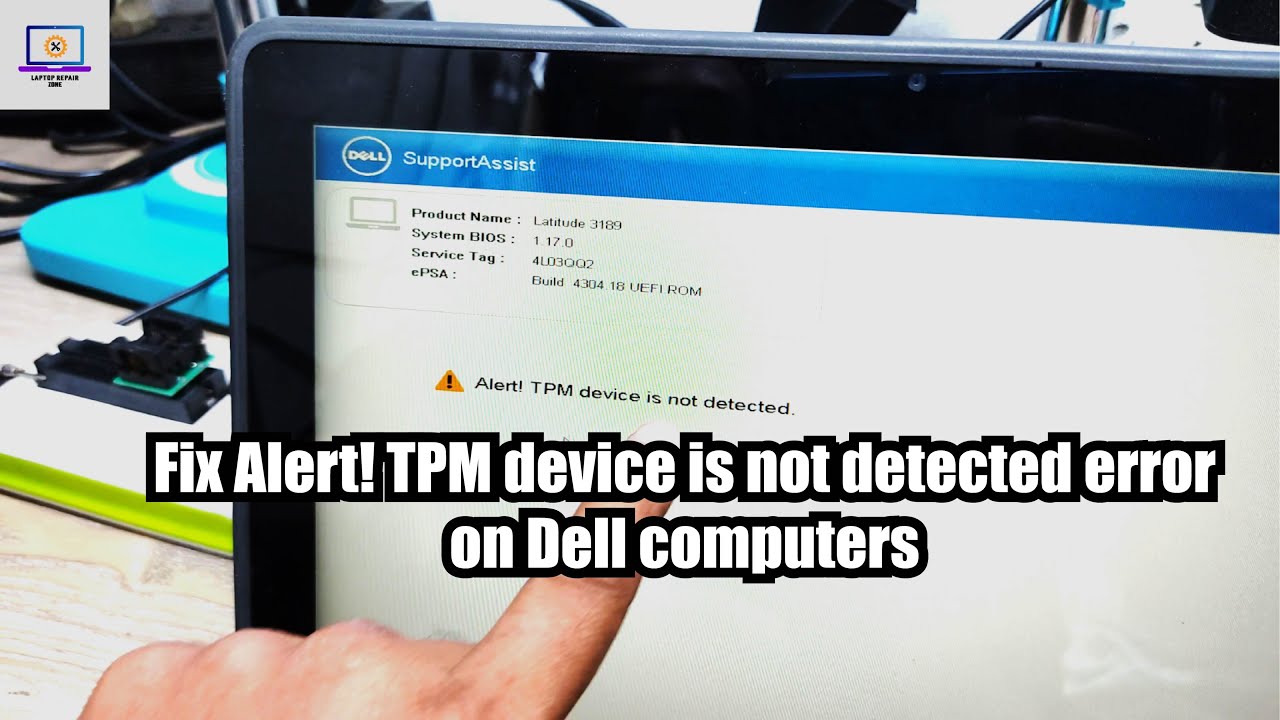
Image source: YouTube
Why Does Your Dell Computer Say the TPM Device is Not Detected?
The root cause of this error often lies in the transition between different types of security hardware. Historically, computers used a Discrete TPM (dTPM) , which was a physical, dedicated chip soldered onto the motherboard. However, starting with Intel's 8th Generation processors, many Dell systems transitioned to Intel Platform Trust Technology (PTT) .
PTT is a firmware-based TPM that resides within the processor itself. This shift is a common source of confusion; users often look for a "TPM" toggle in the BIOS and panic when it is missing, not realizing it has been replaced by the "PTT Security" option. If the BIOS loses its configuration or the PTT firmware hangs, the system reports that no TPM is detected.
Residual "flea power" in the capacitors can prevent the BIOS from correctly scanning hardware components during boot.
A failed or interrupted BIOS update can leave the TPM in an uninitialized state, particularly on Inspiron and Latitude models.
Corporate "wipes" or de-provisioning can sometimes lock the TPM, making it invisible to the operating system until a factory reset is performed.
According to official Dell technical documentation , the error is frequently linked to power state transitions. If a laptop is forced into a hard shutdown while the TPM is in the middle of a cryptographic operation, the chip may "lock up" to prevent a perceived security breach, requiring a full power drain to reset.
How to Fix the TPM Error with a Hard Reset or Static Discharge
The most effective solution for a "vanished" TPM is a static discharge, also known as a hard reset. This process clears the "flea power" from the motherboard's capacitors, forcing the BIOS to perform a fresh hardware discovery on the next boot. This ranks among the top troubleshooting steps recommended by sysadmins on forums like Spiceworks.
The Power Drain Method for Dell Laptops
- Shut down the laptop completely and disconnect the AC adapter.
- If your model has a removable battery, remove it. (For modern XPS or Latitude models with internal batteries, skip this step).
- Disconnect all peripherals, including USB drives, docking stations, and monitors.
- Press and hold the Power Button for 60 seconds . This drains the residual electricity from the logic board.
- Reconnect the AC adapter (and battery) and power the system back on.
The Power Drain Method for Dell Desktops
For Optiplex or Precision desktops, the process is similar. Unplug the power cord from the back of the tower and hold the power button for 30 to 60 seconds. Many users find that after this reset, the TPM magically reappears in the BIOS settings. This works because the TPM/PTT firmware is powered by the motherboard's standby rail; if that rail becomes unstable due to static, the firmware fails to load.
How to Use the Ctrl + Esc BIOS Recovery Shortcut
If a hard reset does not work, the issue may be a corrupted handshake between the BIOS and the security chip. Dell provides a hidden recovery tool that can often kickstart the security firmware without requiring a full Windows reinstallation. This is a notably innovative feature found in Dell systems manufactured after 2015.
To trigger the BIOS Recovery Menu :
- Ensure the laptop is off and the AC adapter is unplugged.
- Press and hold the Ctrl + Esc keys on the keyboard.
- While holding those keys, plug the AC adapter back into the laptop.
- The computer should boot into a "BIOS Recovery" screen. Select Recover BIOS and press Enter.
This process reflashes the boot block of the BIOS, which includes the initialization code for the TPM. According to community wisdom on Reddit's Dell community , this method has a high success rate for systems that were bricked by a background Windows Update that attempted to flash the BIOS automatically.
Where to Find TPM and PTT Settings in Your BIOS
If the hardware is healthy but the settings are misconfigured, the TPM will remain "not detected" by Windows. Navigating the Dell UEFI can be confusing because the interface changed significantly around 2020. You must identify whether your system uses a discrete chip or firmware-based security.
| Feature | Discrete TPM (dTPM) | Intel PTT (fTPM) |
|---|---|---|
| Physical Component | Dedicated Hardware Chip | Integrated in CPU Firmware |
| BIOS Location | Security > TPM 2.0 Security | Security > PTT Security |
| Common In | Pre-2018 / High-end Workstations | Intel 8th Gen and Newer |
| Reliability | Highly Stable | Susceptible to BIOS Bugs |
The Legacy Mode Trap
A common pitfall involves the "Boot Mode" setting. TPM 2.0 is designed to work exclusively with UEFI Mode . If your BIOS is set to "Legacy" or "CSM" (Compatibility Support Module), the TPM will often be disabled or hidden by the system to prevent boot conflicts. If you recently changed your boot settings to run older software, you may have inadvertently caused the TPM to disappear. Ensure that "Secure Boot" is enabled and the boot mode is set to UEFI to restore visibility.
What to Do if a BIOS Update Caused the TPM to Vanish
It is a frustrating irony that the very updates meant to secure your PC can sometimes break it. A known bug in certain Dell Inspiron BIOS versions (such as v1.25) caused the PTT firmware to become unresponsive. In these cases, a standard update isn't enough; you may need the "Double Flash" method.
The "Double Flash" involves reflashing the exact same BIOS version that is currently installed. Because the PTT firmware is a sub-component of the BIOS image, a single flash might successfully update the main BIOS but fail to reach the security sub-module. Reflashing the same version forces the installer to re-verify all components, often "waking up" the missing TPM. If this fails, you may need to download an older version from the Dell Support site, though you should exercise caution as downgrading can sometimes trigger BitLocker lockouts.
How to Recover Your Data if BitLocker is Locked
When the TPM is not detected, BitLocker loses its "root of trust." It can no longer verify that the boot path is secure, so it defaults to a recovery state. To get back into your system, you will need to find your recovery key. Most users will find this key stored in their Microsoft Account under the "Devices" section. If you use a work or school account, the key is likely stored in Azure AD .
For domain-joined machines, there is a specific "Network-Dependent" initialization issue. If your computer is set to only initialize the TPM when it can reach the corporate Domain Controller (to back up the key), it may fail to detect the TPM if you are working from home without a VPN active. Connecting to your corporate network via an Ethernet cable before booting can sometimes resolve the detection error on managed devices.
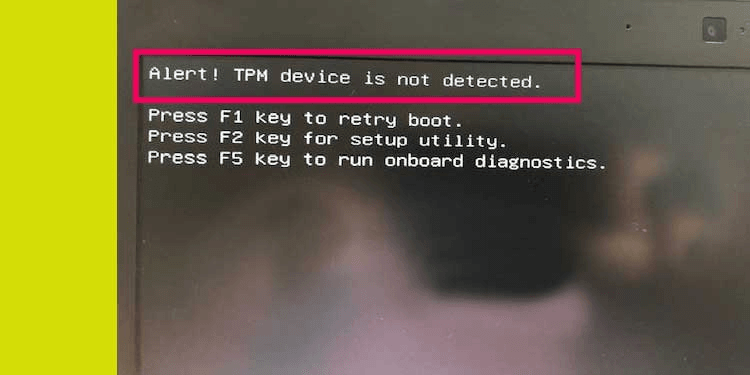
Image source: AOMEI
Advanced Windows Fixes Using PowerShell and Device Manager
If the BIOS shows the TPM is "On" and "Enabled," but Windows still claims it is missing, the issue lies within the OS driver stack. You can diagnose this using the
tpm.msc
tool. If it says "Compatible TPM cannot be found," you should check the Device Manager under
Security Devices
. If you see a yellow exclamation mark, the driver has crashed.
The Rufus Conflict (Information Gain)
An often-overlooked cause for this error involves users who installed Windows 11 on unsupported hardware using tools like Rufus to bypass TPM checks. If you used a bypass and later tried to enable security features or updated your BIOS, the operating system may experience a conflict. Windows 11 expects a specific hardware state that the "bypassed" installation isn't prepared to handle, leading to the "not detected" alert as the OS tries to poll a chip that it was told to ignore during installation.
Using PowerShell to Force Provisioning
You can use administrative PowerShell commands to force Windows to re-link with the BIOS security chip. Open PowerShell as an Administrator and run the following:
get-tpm
If
TpmPresent
is False, the OS cannot see the hardware. If it is True but
TpmReady
is False, run:
Enable-TpmAutoProvisioning
This command tells Windows to take ownership of the TPM and prepare it for use. This is particularly helpful after a motherboard replacement or a major BIOS update where the "ownership" of the chip was lost.
Is Your TPM Hardware Actually Dead?
While software fixes resolve the majority of cases, hardware failure is a possibility. On most modern Dell laptops, the TPM is soldered directly to the motherboard and cannot be replaced individually. If you have performed a hard reset, reflashed the BIOS, and ensured PTT is enabled, but the "TPM Device is not Detected" alert persists, the chip itself may have failed.
A key diagnostic symptom of a failing TPM is the "Sleep vs. Shutdown" bug . Users often report that when the TPM hardware is dying, the PC refuses to fully shut down, instead hanging on a black screen with the power light on. This happens because the system cannot securely save the state to the TPM during the power-down sequence. If your Dell exhibits this behavior alongside the boot alert, it is a strong indicator that a motherboard replacement is required. If your device is under warranty, contact Dell ProSupport and provide the specific error code from the F5 Diagnostics (ePSA) tool.
- Can a BIOS update fix "TPM device not detected"?
- Yes, a BIOS update is often the intended fix, as it contains the latest firmware for Intel PTT. However, if an update caused the problem, you may need to reflash the same version (the "Double Flash" method) to ensure the security sub-module is properly initialized.
- Why did my TPM suddenly disappear from Device Manager?
- This is usually caused by a power state bug or static electricity buildup. When the system enters a deep sleep (S3) or hibernate (S4) state, the TPM may fail to wake up. A hard reset (holding the power button for 60 seconds) is the most effective way to make it reappear.
- How do I enable TPM in Dell BIOS if the option is missing?
- On newer Dell models (Intel 8th Gen+), look for "PTT Security" instead of "TPM." Intel Platform Trust Technology is the firmware-based version of TPM. If both are missing, ensure your BIOS is in UEFI mode , as Legacy mode often hides security settings.
- Will I lose my data if the TPM device is not detected?
- Your data is safe as long as you do not "Clear" or "Reset" the TPM without having your BitLocker recovery key. The error itself doesn't delete data; it just prevents the automated decryption of your drive.
- How to bypass the TPM check on startup?
- You can press F1 to bypass the alert and boot into Windows. However, this is a temporary measure. You will likely face BitLocker prompts or be unable to use features like Windows Hello and PIN login until the underlying hardware issue is resolved.
The Bottom Line
The "Alert! TPM device is not detected" error is a common but fixable hurdle for Dell users. By following a structured recovery stack, you can usually restore your system's security features without data loss.
- Perform a Hard Reset: Discharge static by holding the power button for 60 seconds while unplugged.
- Verify BIOS Settings: Ensure PTT is enabled and the system is in UEFI mode .
- Use BIOS Recovery: Try the Ctrl + Esc shortcut to repair corrupted security firmware.
- Check BitLocker: Always locate your 48-character recovery key before attempting to clear or flash the TPM.
-
Update Drivers:
Use
tpm.mscand PowerShell'sEnable-TpmAutoProvisioningto re-link Windows with the hardware. - Watch for Hardware Failure: If the PC won't shut down properly and the TPM is missing from BIOS, the motherboard may need replacement.
As a practical next step, check your Microsoft account now to ensure your BitLocker recovery key is backed up before you attempt any BIOS-level changes.
-
Topic: Alert! TPM device not detected : r/Dellhttps://www.reddit.com/r/Dell/comments/f50qvq/alert_tpm_device_not_detected/
-
Topic: Alert! TPM device is not detected.https://www.dell.com/community/en/conversations/inspiron/alert-tpm-device-is-not-detected/64dcbeef4da9f06a1b8822d0
-
Topic: How to fix Alert! TPM device is not detectedhttps://www.atera.com/blog/how-to-fix-alert-tpm-device-is-not-detected/

What Do the Icons in the Top Right of Your Surface UEFI Screen Mean?
Identify the SSD X, blue shield, and red bar in your Surface UEFI. Learn to fix bootloops and Secure Boot errors on all Surface models.


How to Fix a Black Screen with a White Line or Blinking Underscore
Stuck on a black screen with a white line or blinking cursor? Fix boot errors, GPU hangs, and BIOS issues on Windows 10 and 11 with this guide.


How to Fix the HP Product Information Not Valid Error on Your Laptop
Resolve the HP System Board 00A error. Learn how to unlock MPM, use DMI tools, and re-enter Feature Bytes to restore your laptop's identity.