
How to Remove Dead Pixels from Your Laptop Screen Safely and Effectively
To fix a pixel issue on your laptop, first identify if it is stuck (colored) or dead (black). For stuck pixels, run a software tool like JScreenFix for 30–60 minutes to cycle the colors. If that fails, apply gentle pressure with a microfiber cloth or use the "Heat Method" with a warm compress. Dead pixels are harder to fix as they often indicate hardware failure, but physical manipulation occasionally revives them. Always check your warranty before attempting risky physical repairs.
Discovering a tiny, unmoving dot on your laptop screen can be incredibly frustrating, especially when working on detailed design projects or watching high-definition media. These imperfections, known as pixel defects, are common in modern LCD and LED displays. While they may seem like permanent damage, many of these issues are actually reversible with the right approach.
This guide explores the technical nuances of pixel failure and provides a tiered recovery protocol. We will move from the safest software-based solutions to more advanced physical techniques, ensuring you have the highest probability of restoring your display without causing further harm. Whether you are dealing with a "lazy" transistor or a complete power failure in a subpixel, understanding the science behind your screen is the first step toward a fix.
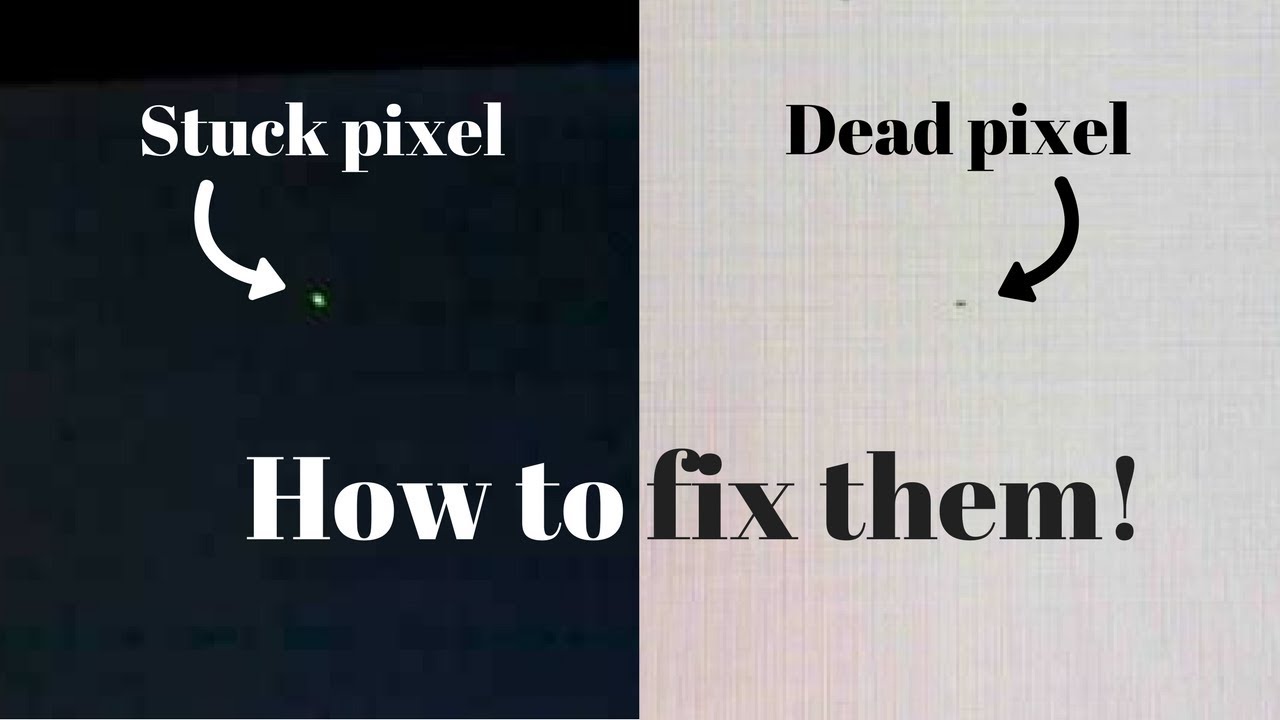
Image source: YouTube
Identifying the Difference Between Stuck and Dead Pixels
Before attempting any repair, you must diagnose the specific type of defect on your panel. Not all "dead" pixels are actually dead; many are simply "stuck." The distinction is critical because the success rate for fixing a stuck pixel is significantly higher than for a truly dead one.
The Anatomy of a Pixel
Every laptop screen is composed of millions of tiny squares called pixels. Each pixel is further divided into three subpixels: Red, Green, and Blue (RGB) . By varying the intensity of these three colors, your laptop can display millions of different hues. According to technical documentation from Lenovo , a pixel defect occurs when one or more of these subpixels fails to respond correctly to the signals from the graphics processing unit (GPU).
Stuck Pixels vs. Dead Pixels
- Stuck Pixels: These appear as bright dots of a single color (often red, green, or blue). They occur when one or more subpixels remain permanently "on." Because the transistor is still receiving power, these are often fixable through software stimulation.
- Dead Pixels: These appear as small black dots. A dead pixel occurs when the transistor has failed completely or is no longer receiving power, leaving the pixel in a permanent "off" state. While widely considered permanent, some physical methods can occasionally "jump-start" the connection.
- Hot Pixels: These are pixels that are permanently white. This happens when all three subpixels are stuck in the "on" position.
The Color Stress Test
To confirm the defect, use a full-screen color test. Display a solid black image; if you see a colored dot, it is a stuck pixel. Display a solid white image; if you see a black dot, it is a dead pixel. You should also test with solid red, green, and blue backgrounds to see which specific subpixel is failing. This diagnostic step is essential for tools like OnlineMicTest , which can target specific color frequencies.
If you see a cluster of green or "sparkling" pixels that move or disappear when you change windows, you likely aren't dealing with a dead pixel. This is often a sign of a GPU overheating or a failing display cable. If the dots are stationary regardless of what is on the screen, the issue is definitely the LCD panel itself.
Using Software Tools to Revive Stuck Pixels
Software is the safest and most effective starting point for pixel repair. These tools work on the principle of "visual noise" or rapid color cycling. By forcing the subpixels to switch between different colors at a high frequency (often 60 times per second), the software can sometimes "unstick" a lazy transistor.
The JScreenFix Protocol
JScreenFix is widely regarded as a top choice for web-based pixel repair. It uses an HTML5 and JavaScript algorithm to create a small box of rapidly flickering pixels. You simply drag this box over the affected area and let it run. According to the developers, this method has an 80% success rate for stuck pixels when applied for at least 20 minutes.
Alternative Software Options
If JScreenFix does not yield results, you may want to try UDPixel (UndeadPixel) . This is a downloadable Windows utility that allows you to run multiple "flicker windows" simultaneously—useful if you have several stuck pixels across the screen. It also includes a cycle of solid colors to help you locate the pixels more easily during the process.
Recommended Duration and Settings
Do not expect an instant fix. For the best results, follow these steps:
- Set your laptop brightness to 100%.
- Disable your screensaver and "sleep" mode.
- Run the software for at least 30 to 60 minutes.
- If the pixel remains, try running the tool overnight. The prolonged stimulation is sometimes necessary for stubborn transistors.
Image source: Hire Tablets
Applying Physical Pressure and Heat to Stubborn Pixels
If software fails, the issue may be physical. In some cases, the liquid crystal inside the panel has not distributed evenly, or a connection has become slightly displaced. Physical manipulation—while riskier—can sometimes resolve these hardware-level hitches.
The Massage Method
This technique involves applying targeted pressure to the pixel to encourage liquid crystal flow. It is a significant advancement over software if the problem is mechanical. Follow these steps carefully to avoid cracking your screen:
- Step 1: Turn off your laptop screen.
- Step 2: Wrap a soft, clean microfiber cloth around a blunt, narrow object (like the rounded end of a pen cap or a dedicated stylus).
- Step 3: Apply very gentle pressure directly to the affected pixel. You should see a slight "ripple" effect around the point of contact.
- Step 4: While maintaining pressure, turn the screen back on.
- Step 5: Remove the pressure and check if the pixel has returned to normal.
The Thermal Method
Heat can increase the fluidity of the liquid crystals, making them more responsive to the transistors. According to MobilePixels , gentle warmth is a documented method for reviving stubborn pixels. To do this safely, place a damp (not wet) cloth in a plastic bag and heat it in the microwave for a few seconds until it is warm but not hot. Hold the bag against the affected area for 2–3 minutes while running a software fixing tool simultaneously.
Some older internet forums suggest using a needle to "poke" the pixel through the screen's surface. Never attempt this. Modern laptop screens have multiple layers of polarized glass and plastic. Poking the screen with a sharp object will cause permanent physical punctures, lead to "bleeding" of the liquid crystal, and instantly void your warranty. Stick to blunt, soft pressure only.
Adjusting the Laptop Bezel for Edge Pixel Issues
Laptops are unique because their screens are housed in a thin plastic or metal frame (the bezel). Sometimes, the pressure from the bezel itself or a slightly loose internal ribbon cable can cause a row of pixels or a specific corner pixel to fail. This is particularly common in ultra-thin laptops where tolerances are tight.
The Gentle Flex Technique
If your dead pixel is near the edge of the screen, try the "Gentle Flex." Hold the top corners of your laptop screen and apply a very slight torque—twisting one corner toward you and the other away from you. Do not use force. If the pixel flickers or changes color during this movement, the issue is likely a loose connection or bezel pressure rather than a dead transistor.
Bezel Adjustment
Check if the plastic frame around your screen is pinching the LCD. Sometimes, a small piece of debris trapped under the bezel can apply enough pressure to "kill" a pixel. Use a thin plastic tool (like a guitar pick) to gently lift the edge of the bezel near the pixel. If the pixel revives, you may need to clean the area or have the bezel reseated by a professional.
Comparing Pixel Recovery Methods and Success Rates
Choosing the right method depends on your risk tolerance and the type of pixel defect you are facing. The following matrix provides a decision framework based on typical success rates observed in the technician community.
| Method | Best For | Success Probability | Risk Level |
|---|---|---|---|
| Software (JScreenFix) | Stuck Pixels (Colored) | High (approx. 80%) | Zero |
| Massage Method | Stubborn Stuck Pixels | Moderate | Moderate (Pressure risk) |
| Heat Method | Dead Pixels (Black) | Low | High (Thermal damage) |
| Bezel Flexing | Edge/Corner Pixels | Moderate | Moderate (Frame stress) |
| Power Cycling | Temporary Glitches | Low | Zero |
Navigating Manufacturer Warranties and ISO Standards
If DIY methods fail, your next step is to check your warranty. However, you might be surprised to find that a single dead pixel does not always qualify for a free screen replacement. Manufacturers follow international standards that define what constitutes a "defective" display.
Understanding ISO 9241-302
The International Organization for Standardization (ISO) has established the ISO 9241-302 standard, which classifies displays based on their pixel fault tolerance. Most consumer laptops are classified as "Class II." Under this standard, a manufacturer is legally allowed to sell a screen that has up to 2 bright pixels, 2 dark pixels, or 5 subpixel faults per million pixels. On a standard 1080p screen (which has about 2 million pixels), this means you might need 4 or 5 dead pixels before the manufacturer is required to replace it.
Manufacturer-Specific Policies
- Dell: Their "Premium Panel Guarantee" covers even a single bright pixel on UltraSharp and Latitude models, but standard Inspiron models may require more defects for a claim.
- Apple: Apple uses a "Bright/Dark Pixel" distinction. They are generally more lenient with bright pixels but may require a specific count of dark pixels before authorizing a repair.
- Lenovo: Policies vary by product tier (ThinkPad vs. IdeaPad). High-end workstations often have a "zero dead pixel" policy for the first year.
The "Replacement Lottery"
Before sending your laptop in for a single dead pixel, consider the "Replacement Lottery." If your current screen is perfect except for one tiny dot in the corner, a replacement screen might come back with a dead pixel in the center, or worse, backlight bleed issues. Many enthusiasts recommend living with a single peripheral dead pixel rather than risking a refurbished replacement that could have more significant flaws.
Protecting Your Laptop Screen from Future Damage
Prevention is always better than repair. While some pixel failures are inevitable due to manufacturing variances, many are caused by environmental factors and poor handling. By following these maintenance tips, you can extend the life of your LCD panel.
Heat Management
Excessive heat is a primary driver of transistor degradation. If your laptop runs hot, the delicate electronics behind the screen are under constant stress. Ensure your laptop's cooling fans are clean and avoid using your laptop on soft surfaces like blankets, which can block airflow and bake the screen from the inside out.
Proper Cleaning Techniques
Never use harsh chemicals like Windex or alcohol-based cleaners on your laptop screen. These can seep into the layers of the display and cause the adhesive to fail or the liquid crystals to react. Use a dry microfiber cloth or a dedicated screen cleaner that is labeled as "ammonia-free" and "alcohol-free."
Safe Transport
Most dead pixels on laptops are caused by "pressure spots" during travel. If you cram your laptop into a tight backpack with books or a charger pressing against the lid, the pressure can permanently damage the pixels. Always use a padded sleeve and ensure nothing is pressing against the outer lid of the laptop.
Common Questions About Laptop Pixel Repair
Summary of Effective Pixel Recovery Strategies
Fixing a dead or stuck pixel requires a balance of patience and precision. While not every pixel can be saved, following a structured protocol maximizes your chances of success.
- Identify the defect: Use solid color backgrounds to determine if the pixel is stuck (colored) or dead (black).
- Start with software: Run JScreenFix or UDPixel for at least one hour before trying physical methods.
- Try a power cycle: Turn the laptop off and leave it unplugged for an hour to allow all capacitors to discharge.
- Apply gentle pressure: Use a microfiber cloth and a blunt object to "massage" the pixel while the screen is on.
- Use controlled heat: Apply a warm compress to the area to increase liquid crystal mobility.
- Check your warranty: Reference ISO 9241-302 standards to see if you qualify for a professional replacement.
- Know when to stop: If the pixel is black and located in a corner, it is often safer to ignore it than to risk cracking the entire panel.
If your pixel remains after 24 hours of various treatments, it is likely a permanent hardware failure that requires a professional screen replacement to resolve.
-
Topic: JScreenFix - Stuck Pixel Repairhttps://www.jscreenfix.com/
-
Topic: Is there any way to fix a stuck pixel : r/Monitorshttps://www.reddit.com/r/Monitors/comments/12np5zo/is_there_any_way_to_fix_a_stuck_pixel/
-
Topic: How to Fix Dead Pixels - Easy Method That Actually Workshttps://www.youtube.com/watch?v=zGdQeETWWpY

How to Identify and Repair a Dead Pixel on Your Laptop Screen
Fix stuck or dead pixels on your laptop screen with software, pressure, and warranty tips. Expert DIY repair guide for all display types.


How to Identify and Fix Different Types of Spots on Your Laptop Screen
Identify white pressure marks, dead pixels, or LCD leaks. Learn which spots are fixable and when to seek professional repair for your laptop screen.


How to Diagnose and Fix Black Lines on Your Laptop Screen
Fix black lines on your laptop screen with our diagnostic guide. Learn costs, brand-specific tests for Dell, HP, Lenovo, and repair vs replace tips.