
How to Access and Troubleshoot the Chromebook Enrollment Screen for Managed Devices
To manually trigger the Chromebook enrollment screen, use the keyboard shortcut Ctrl + Alt + E at the initial sign-in screen. This command bypasses the standard user login and opens the enterprise enrollment interface. For modern ChromeOS versions (post-2023), you may first need to select "Work or School use" when prompted during the initial setup wizard.
The Chromebook enrollment screen serves as the critical entry point for Google Endpoint Management. Whether you are an IT administrator deploying a fleet of thousands or a consumer who has accidentally purchased a managed device, understanding how this interface functions is essential. Enrollment links a physical device's serial number to a specific Google Workspace domain, allowing organizations to enforce security policies, install mandatory applications, and track assets remotely.
What Is the Chromebook Enrollment Screen and Why Does It Appear?
The enrollment screen is a specialized interface within ChromeOS that facilitates the registration of a device into an organization's management console. Unlike a standard personal login, which simply connects a user to their Google account, enrollment establishes a persistent link between the hardware and the enterprise. This process is governed by the ChromeOS management ecosystem, which relies on the device's unique Trusted Platform Module (TPM) to verify its identity.
In recent years, Google has updated the ChromeOS setup flow to be more intuitive. As of 2026, modern versions of the operating system often present a "How will you use this device?" prompt during the initial Out-of-Box Experience (OOBE). Users are typically given two choices: "Personal Use" or "Work/School Use." Selecting the latter often directs the user straight to the enrollment screen. However, if a device has been previously managed, it may trigger "Forced Re-enrollment," a security feature that prevents users from bypassing management by simply factory resetting the machine.
According to Google Support , enrollment must occur before any user signs in for the first time. If a user logs in with a personal @gmail.com account before the device is enrolled, the management policies cannot be applied until the device is "Powerwashed" (factory reset) and the process is restarted. This sequence ensures that the organization maintains full control over the device's lifecycle from the moment it is unboxed.
How to Manually Trigger the Enrollment Screen Using Keyboard Shortcuts
While the setup wizard usually guides users toward enrollment, there are many scenarios where the option does not appear automatically. This is common when a device has been wiped or when the network configuration prevents the initial "Work/School" prompt from loading correctly. In these instances, manual intervention is required.
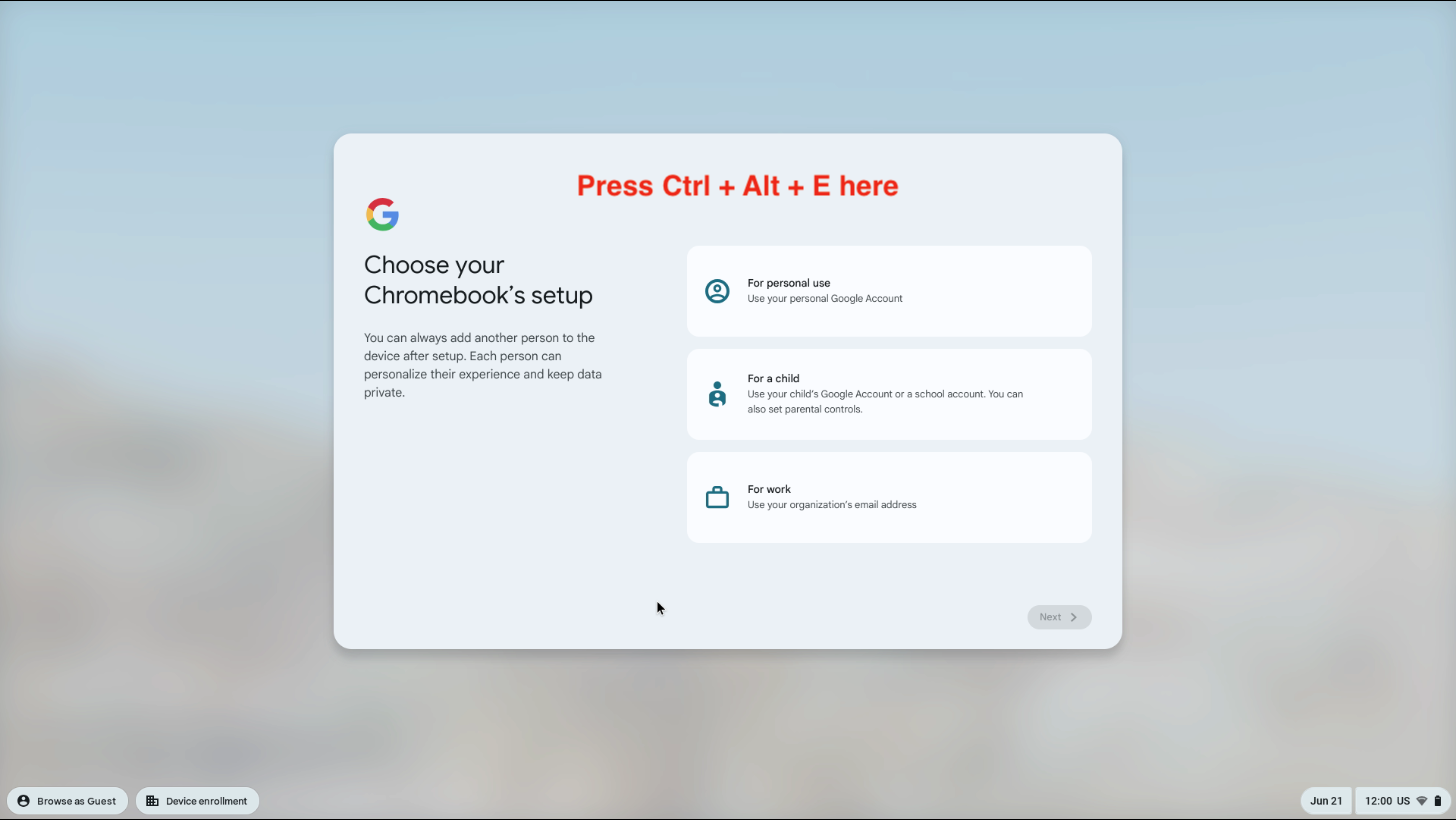
Image source: Saga Education Knowledge Base - Help Scout
How to Access Enrollment on a Chromebook Tablet
Enrolling a tablet-form factor Chromebook, such as the Lenovo Duet or Pixel Slate, presents a unique challenge because these devices often lack a physical keyboard during the initial setup. To access the enrollment screen on a tablet, you must utilize the virtual keyboard's hidden settings. First, tap the "Email or phone" field to bring up the on-screen keyboard. Look for the "More" icon (often three dots or a gear) and select "Switch to full layout." This expands the virtual keyboard to include the Ctrl and Alt keys, allowing you to tap the required combination.
How to Enroll Your Device in the Google Admin Console
Successful enrollment requires more than just the right keyboard shortcut; it requires a properly configured Google Admin Console and the correct licenses. Google offers three primary license types: ChromeOS Enterprise Upgrade, ChromeOS Education Upgrade, and Kiosk & Signage Upgrade. These licenses are not interchangeable, and attempting to enroll a device with the wrong license type will result in an error message.
Administrators should verify their license count before beginning a deployment. If the organization has run out of "upgrades," the enrollment process will fail at the final step. You can check your available licenses by navigating to Devices > Chrome > Devices in the Admin Console and clicking on the "Upgrades" section. For organizations using SureMDM or other third-party managers , additional configuration steps may be necessary to sync the Google Admin Console with the external MDM provider.
Why You Should Use an Enrollment Service Account Instead of a Super Admin
A common mistake among new IT administrators is using a Super Admin account to enroll devices. While this works, it poses a significant security risk. If the credentials are saved or intercepted during a large-scale deployment, the entire domain could be compromised. Furthermore, Google’s security algorithms often flag Super Admin accounts that log in to dozens of new devices in a short period, triggering CAPTCHA challenges or temporary account locks.
A top-tier practice is to create a dedicated "Enrollment Service Account." This is a standard user account with the specific "Enrollment" permission granted via a custom admin role. This account should have two-factor authentication (2FA) disabled temporarily or managed via security keys to streamline the process. Using a service account ensures that even if the credentials are compromised, the attacker only has the power to enroll more devices, not to delete users or change domain-wide settings.
How to Automate Mass Deployment for Large Fleets
Manually typing credentials into hundreds of Chromebooks is inefficient and prone to human error. For large-scale rollouts, automation is a necessity. There are three primary ways to handle mass deployment: USB automation, Zero-Touch Enrollment (ZTE), and third-party white-glove services.
| Method | Cost | Speed | Best For |
|---|---|---|---|
| Manual Entry | Free | Slow | Small offices (<10 devices) |
| USB Automation | $50 - $150 | Fast | Medium fleets (50-500 devices) |
| Zero-Touch (ZTE) | Included/Low | Instant | Large enterprises (500+ devices) |
| White-Glove | $5 - $25/unit | N/A (Outsourced) | Organizations without IT staff |
Using USB Automation Tools Like Rubber Ducky or Go-Box
USB automation tools, often referred to as "keystroke injectors," are a popular choice for mid-sized deployments. Devices like the Hak5 Rubber Ducky or the purpose-built Go-Box act as a virtual keyboard. When plugged into a Chromebook at the sign-in screen, they "type" the Ctrl + Alt + E shortcut, enter the service account email, hit enter, type the password, and complete the enrollment process in seconds. This method significantly reduces the time per device and eliminates typos.
The Benefits of Zero-Touch Enrollment (ZTE)
Zero-Touch Enrollment is widely considered one of the most efficient ways to manage large fleets. With ZTE, the hardware vendor (such as Dell, HP, or Lenovo) pre-registers the device's serial number and a pre-provisioning token with Google’s cloud servers before the device even ships. When the end-user receives the Chromebook and connects it to Wi-Fi, the device automatically checks in with Google, recognizes its managed status, and enrolls itself without any manual keyboard shortcuts or credential entry.
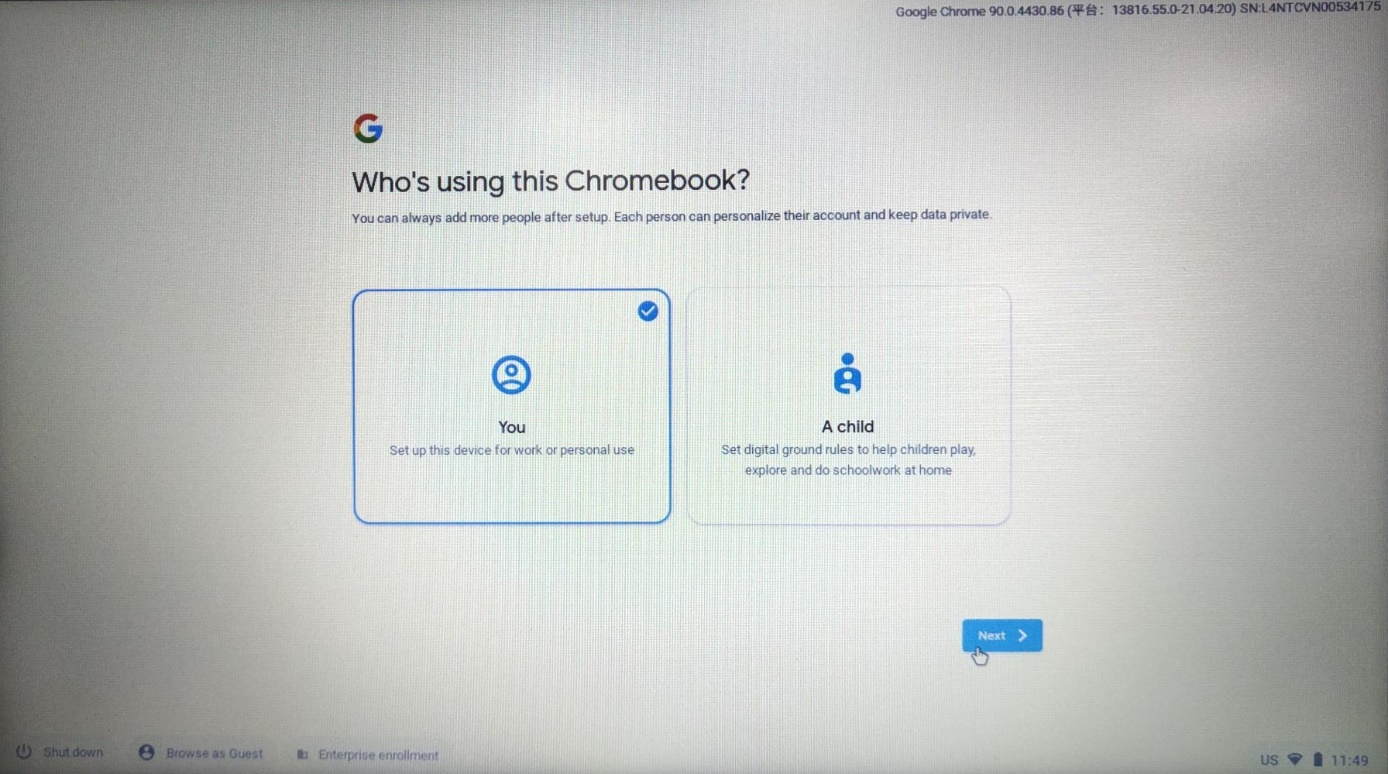
Image source: ASUS
Understanding White-Glove Service Costs
Many resellers offer "white-glove" services, where they unbox the devices, update the ChromeOS version, enroll them into your domain, and sometimes even apply asset tags or protective cases. According to AdminRemix , these services typically cost between $5 and $25 per device. While this adds to the initial capital expenditure, it can save hundreds of hours of labor for small IT teams, making it a strong contender for schools and businesses during the summer refresh cycle.
What to Do if You Are Stuck on the Enrollment Screen After a Powerwash
A common source of frustration for users is the "Forced Re-enrollment" loop. If a device was previously managed by an organization, a standard Powerwash (factory reset) will not remove the management. During the setup process, the Chromebook sends its serial number to Google's servers. If the server responds that the device is still "Provisioned," the Chromebook will block the user from signing in with a personal account and force them back to the enrollment screen.
This is a security feature designed to render stolen or lost enterprise devices useless to unauthorized parties. If you are stuck in this loop on a device you legitimately own, it means the previous administrator failed to "Deprovision" the device before selling or gifting it. There is no software-based "bypass" for this within the standard ChromeOS environment, as the management status is stored in Google's cloud database, not just on the local hardware.
How to Remove Enterprise Enrollment from a Second-Hand Chromebook
Purchasing a used Chromebook from eBay or Facebook Marketplace only to find it locked to a school district or corporation is a frequent issue. Because the serial number is "pinned" in the Google Admin Console, the device will remain managed regardless of how many times you reset it or even if you replace the internal storage (SSD).
How to Ask a Previous Owner to Deprovision the Device
The only official and permanent fix is to have the IT administrator of the managing organization deprovision the device. You must contact the seller and provide them with the device's serial number. The admin must then log into the Google Admin Console, locate the device, and select "Deprovision." They should choose the option "Retiring from fleet" or "Device sold" to ensure the serial number is released from their domain. Once this is done, you can Powerwash the device one last time, and it will behave like a standard consumer Chromebook.
Hardware Methods to Bypass Enrollment as a Last Resort
For older devices that are no longer supported by the original organization, or for hobbyists looking to repurpose "e-waste," some hardware-level methods exist. Note: These methods will void your warranty and may permanently damage the device. Furthermore, modern Chromebooks (post-2021) have significantly more robust security that makes these bypasses nearly impossible.
How to Identify and Remove Hardware Write-Protect Screws
On legacy Chromebooks, such as the Samsung XE303C12, the system firmware (BIOS/Coreboot) is protected by a physical "write-protect" screw on the motherboard. When this screw is present, the firmware cannot be modified, and the enterprise enrollment flag remains locked. Technicians often remove this screw to flash custom firmware (like MrChromebox) which completely replaces the Google BIOS, effectively removing the enrollment check. However, finding the screw requires opening the chassis and identifying the specific contact points on the motherboard, a process documented by communities like SuperUser .
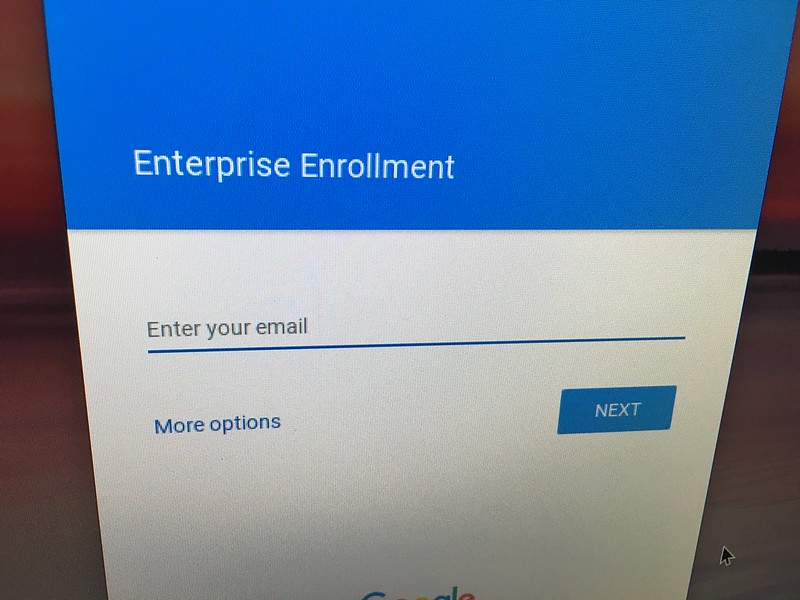
Image source: iFixit
The Battery Disconnect Method for Clearing Admin Flags
Another "last resort" technique involves the "Battery Disconnect" bypass. Some older models store the "Admin Block" flag in a way that requires a constant trickle of power from the internal battery. By opening the device, disconnecting the main battery, and holding the power button for 30-60 seconds, you can sometimes discharge the motherboard's capacitors and clear the volatile memory holding the management flag. This is not a guaranteed fix and is highly dependent on the specific hardware revision of the Chromebook.
Common Chromebook Enrollment Error Codes and How to Fix Them
Even with the correct shortcut and account, enrollment can fail. Understanding the specific error codes can save hours of troubleshooting. Most errors are related to network restrictions, license availability, or account permissions.
This occurs when your Google Admin Console has zero available licenses. You must purchase additional ChromeOS Enterprise or Education upgrades through your reseller. Once the licenses appear in your console, the enrollment will proceed.
This is a common point of confusion. You cannot enroll a device using a standard @gmail.com account. You must use an account that belongs to a Google Workspace domain (e.g., admin@yourcompany.com) and that account must have the "Enrollment" permission enabled in the Admin Console.
Enrollment requires access to specific Google ports (80 and 443). If you are on a school or corporate network with a firewall, ensure that
*.google.com
and
*.googleapis.com
are whitelisted. If you see a captive portal (a login page for the Wi-Fi), you must complete that login before pressing
Ctrl + Alt + E
.
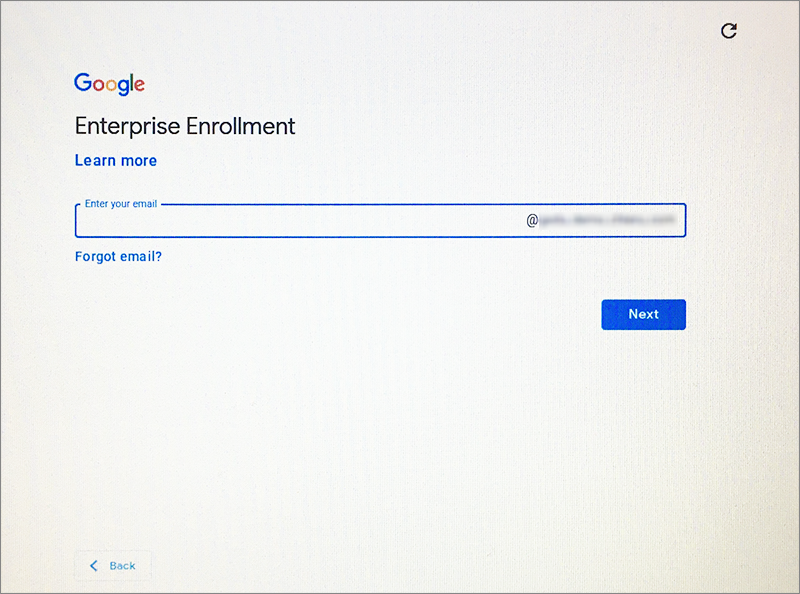
Image source: Manchester School District Technology Helpdesk - Freshdesk
Frequently Asked Questions
No. Unlike a traditional Windows laptop where the OS and its restrictions live on the hard drive, a Chromebook's management identity is tied to the hardware's unique serial number and the TPM (Trusted Platform Module) chip on the motherboard. When the device connects to the internet, it checks Google's servers to see if that serial number is managed. Changing the storage will not change the serial number or the server-side record.
The universal shortcut is Ctrl + Alt + E . This should be pressed at the initial sign-in screen before any user logs in. On newer versions of ChromeOS, you may need to navigate through the "Work or School use" prompts first, but the shortcut remains the most reliable way to force the enrollment interface to appear.
This is due to a policy called "Forced Re-enrollment." The organization that originally owned the device has set a policy that prevents the device from being used as a personal machine. Even after a factory reset, the device identifies itself to Google, which then instructs the device to re-enter managed mode. Only the original administrator can release this lock by deprovisioning the device in their console.
The cost varies depending on the type of organization. Education upgrades are typically the most affordable, often ranging from $30 to $50 for a perpetual license (lasting the life of the device). Enterprise upgrades are usually more expensive and may be sold as annual subscriptions or one-time perpetual fees, often ranging from $50 to $150 per device depending on the volume and reseller agreement.
No. The enrollment process requires an active internet connection to communicate with Google's Device Management servers. The device must verify its serial number and download the specific policies set by the administrator. If you are in an environment without Wi-Fi, you can use a USB-to-Ethernet adapter to provide a wired connection, which is often more stable for mass deployments.
Key Takeaways for Managing Chromebook Enrollment
- Use the Shortcut: Always remember Ctrl + Alt + E to trigger the enrollment screen manually if the prompt does not appear.
- Verify Licenses: Ensure your Google Admin Console has enough "Upgrades" before starting a deployment to avoid mid-process failures.
- Prioritize Security: Use a dedicated Enrollment Service Account rather than a Super Admin account to protect your domain.
- Automate Large Fleets: Consider Zero-Touch Enrollment (ZTE) or USB automation tools to save time and reduce errors during mass rollouts.
- Check Second-Hand Status: Before buying a used Chromebook, verify it is not managed; if it is, the seller must deprovision it for you to use it personally.
- Understand Hardware Limits: Hardware bypasses like removing write-protect screws are risky, void warranties, and rarely work on modern devices.
For the most efficient deployment, verify your network's firewall settings and license counts before unboxing your first device.
-
Topic: Enroll ChromeOS devices - Chrome Enterprise and ...https://support.google.com/chrome/a/answer/1360534?hl=en
-
Topic: Google ChromeOS Device Enrollment - Documentationhttps://docs.42gears.com/suremdm/chrome-manage/chromebook-manage/chromebook-enterprise-enrollment/google-chrome-os-device-enrollment
-
Topic: Remove Enterprise Enrollment from Chrome OShttps://superuser.com/questions/811404/remove-enterprise-enrollment-from-chrome-os

How to Powerwash Your Chromebook to Fix Bugs or Wipe Your Data Safely
Powerwash your Chromebook via settings or shortcuts. Includes TPM security, Linux backup tips, and owner account recovery steps.


How to Find and Use the Pixelbook Refresh Key for Hard Resets
Locate the refresh key on your Pixelbook or Pixelbook Go. Learn shortcuts for hard resets, recovery mode, and fixing a frozen ChromeOS screen.


How to Install and Run AppImage Files on Your Chromebook Successfully
Learn to run AppImages on ChromeOS. Fix FUSE errors, set permissions, and add apps to your launcher using the Linux environment in 2026.