How to Diagnose and Fix a Vertical Line on Your Monitor Screen
To immediately identify the root cause, perform the BIOS/No-Signal Test . Disconnect your video cable (HDMI/DisplayPort) from the PC while the monitor is on. If the vertical line persists on the "No Signal" floating box or the BIOS screen, the issue is a hardware failure within the monitor panel or T-Con board. If the line disappears, the problem lies with your GPU drivers, software, or cable .
Discovering a persistent vertical line on your monitor screen is a frustrating experience that often triggers immediate concern about hardware replacement costs. Whether it is a single thin red line or a thick black bar, these artifacts indicate a disruption in the signal path between your computer's graphics processor and the individual pixels on your display. While some instances signal permanent panel damage, many cases are solvable through software calibration, cable management, or specific power adjustments.
This guide provides a technical deep-dive into the causes of vertical lines, ranging from column driver failures to thermal degradation. We will explore community-vetted solutions like the "Bezel Squeeze" and explain why portable monitors require specific wattage to maintain image stability. By following this diagnostic framework, you can determine if your screen is a candidate for a quick fix or if it is time to navigate manufacturer warranty policies.
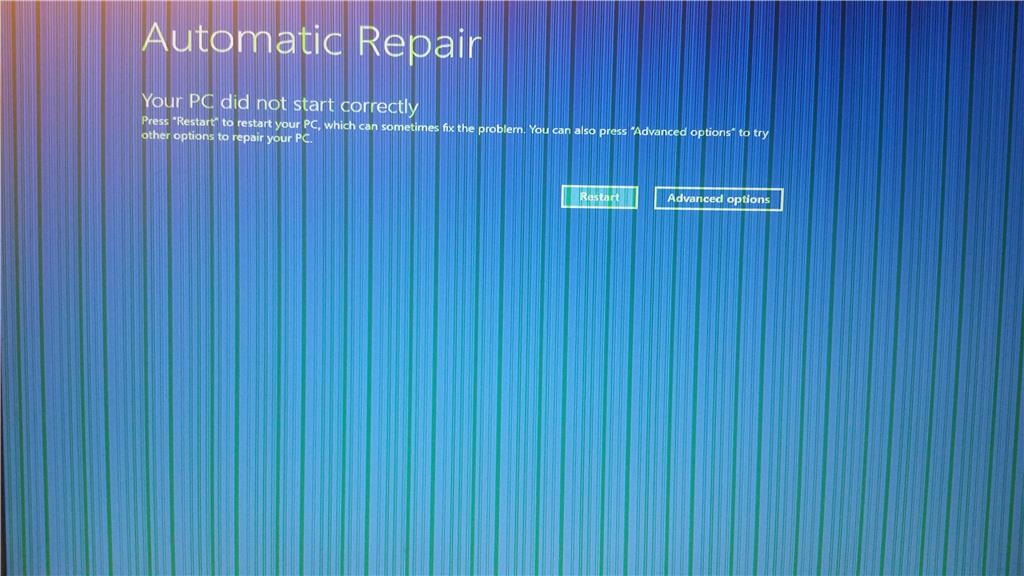
Image source: Microsoft Learn
Why Is There a Vertical Line on My Monitor?
To fix the issue, you must first understand the architecture of a modern Liquid Crystal Display (LCD). Your screen is composed of a grid of pixels, where each vertical column is controlled by a specific component called a column driver . When a vertical line appears, it typically means that the electrical connection to that specific column has been interrupted or is receiving "stuck" data.
Understanding Column Driver Failure
Each vertical line corresponds to a specific output on the source driver integrated circuits (ICs). These ICs are often bonded directly to the glass of the panel using a process called "Tab Bonding." If the adhesive or the delicate ribbon cable (COF - Chip on Film) becomes loose due to physical stress or manufacturing defects, the entire column of pixels loses its signal. This results in a line that is either permanently "on" (showing a bright color like red, green, or blue) or permanently "off" (a black line).
The Role of the T-Con Board
The Timing Controller, or T-Con board , is the "brain" of the monitor. It takes the complex video signal from your HDMI or DisplayPort cable and translates it into the specific timing required for the row and column drivers. If the T-Con board begins to fail, you may see multiple vertical lines, flickering artifacts, or "rainbow" patterns across the screen. Unlike a single-column failure, T-Con issues often affect large sections of the display simultaneously.
Thermal Degradation and Heat Expansion
Electronic components expand and contract as they heat up. In some cases, a vertical line may only appear after the monitor has been running for an hour or more. This is often due to thermal degradation . As the monitor reaches its operating temperature, a microscopic fracture in a solder joint or a ribbon cable connection expands just enough to break the circuit. According to LG Support documentation , ensuring proper ventilation is critical, as overheating can accelerate these internal hardware failures.
Quick Software and Cable Fixes to Try First
Before assuming your hardware is broken, you must rule out the "ghost" lines caused by signal interference or corrupted software. These issues are far more common than actual panel failure and are significantly easier to resolve.
Reseating and Swapping Cables
A loose or damaged HDMI or DisplayPort cable is a frequent culprit. If the pins in the connector are slightly bent or if the cable is not fully seated, the digital handshake between the PC and monitor can fail, leading to vertical artifacts. Always try a different, high-quality cable to see if the line persists. Ensure you are using a cable rated for your monitor's resolution and refresh rate (e.g., a DisplayPort 1.4 cable for 4K 144Hz displays).
GPU Driver Clean Install with DDU
Sometimes, the vertical line is not a hardware fault but a rendering error from your graphics card. Standard driver updates may not be enough if the underlying files are corrupted. Experts recommend using Display Driver Uninstaller (DDU) to completely wipe existing drivers in Safe Mode before performing a clean installation of the latest drivers from NVIDIA, AMD, or Intel. This ensures that no legacy settings are causing the artifacting.
The OSD Menu Overlay Test
This is a definitive way to isolate the problem. Press the physical buttons on your monitor to open the On-Screen Display (OSD) menu. If the vertical line appears underneath the menu (meaning the menu looks perfect while the line is visible behind it), the problem is likely your cable or PC. If the line appears on top of the menu, the fault is definitely within the monitor's internal hardware. This test is a top-tier diagnostic tool for quickly triaging the situation.
How to Use the Refresh Rate Stress Test for a Temporary Fix
If your monitor is aging, its internal components may no longer be able to handle high-bandwidth signals. A monitor that shows vertical lines at 144Hz might function perfectly at 60Hz. This is a common symptom of a failing T-Con board or a cable that has reached its signal integrity limit.
Bandwidth Limitations and Aging Components
High refresh rates require the T-Con board to process data at incredible speeds. As capacitors age or ribbon cables degrade, they may struggle to maintain the necessary voltage for these high-speed transitions. By lowering the refresh rate, you reduce the stress on these components, which can often "clear" the vertical lines. While this is not a permanent repair, it is an excellent choice for extending the life of a monitor used for office work or secondary tasks.
Step-by-Step Refresh Rate Adjustment
According to technical insights from KTCPlay , these bandwidth-related artifacts are particularly common when using long cables or uncertified adapters.
Solving Vertical Lines on Portable Monitors
Portable monitors have become a popular choice for remote workers, but they suffer from a unique issue: Power Delivery (PD) insufficiency . Most portable screens are powered via a single USB-C cable connected to a laptop. This is known as "bus power."
If your laptop cannot provide a stable current, the monitor's internal logic board may struggle to drive the pixels correctly, resulting in flickering vertical lines or "ghosting" columns. Many of these displays require between 30W and 60W of dedicated power to function reliably at full brightness. If you see lines on a portable screen, the first step should always be to plug the monitor into a dedicated wall outlet using a high-wattage PD power brick rather than relying on the laptop's USB port.
Visual Triage: Identifying Fixable vs. Unfixable Damage
Not all lines are created equal. Before attempting a DIY repair, use this table to determine if your monitor is salvageable.
| Symptom | Likely Cause | Fixability |
|---|---|---|
| Single thin colored line | Tab Bond / Column Driver | Moderate (Pressure Fix) |
| Thick black vertical bar | Dead Gate Driver / Panel Failure | Low (Requires Panel Swap) |
| Flickering rainbow lines | T-Con Board Failure | High (Replace T-Con Board) |
| Spider-web / Diagonal cracks | Physical Impact / Cracked Glass | Unfixable |
| Line disappears on white background | Stuck-on Subpixel | High (Software/Massage) |
The Subpixel Logic Test is particularly useful. If a blue line disappears when the screen displays a pure white background, it indicates a "stuck-on" subpixel. Since white light requires all RGB subpixels to be at full intensity, a subpixel that is already stuck "on" will blend into the white, confirming that the hardware is still receiving power but is simply unresponsive to "off" commands.
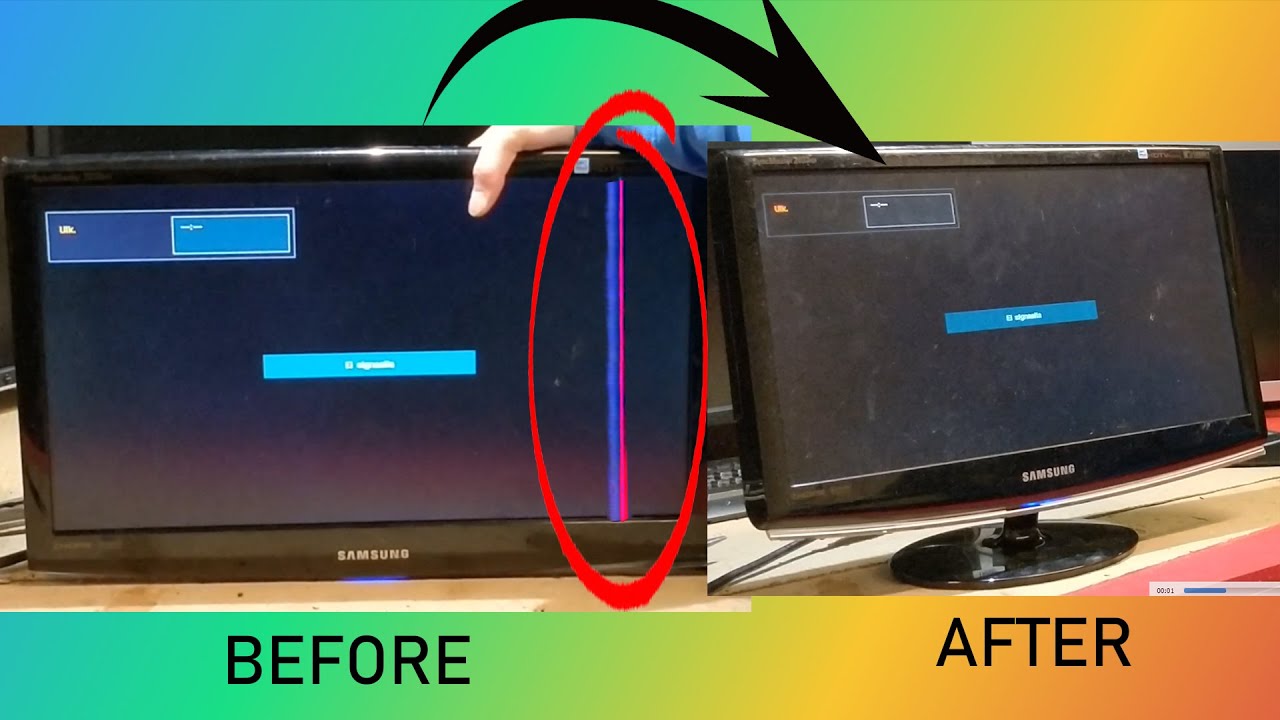
Image source: YouTube
Advanced DIY Fixes for Hardware Failures
The Bezel Squeeze Technique
Since many vertical lines are caused by a loose "Tab Bond" (the connection between the ribbon cable and the glass), applying pressure can sometimes re-establish the electrical path. Identify the exact location of the line and gently squeeze the plastic bezel at the very top or bottom of that column. If the line flickers or disappears, you have found the loose connection. Some users in enthusiast communities have found success by placing a small "Paper Shim" (a folded piece of cardstock) inside the bezel to maintain constant pressure on that specific spot.
Cleaning Ribbon Cables
For those comfortable with disassembly, vertical lines can occasionally be caused by oxidation or dust on the ribbon cables connecting the T-Con board to the panel. Using 90% or higher Isopropyl alcohol and a lint-free swab, you can gently clean the gold contacts of the ribbon cables. Ensure the components are completely dry before reassembling. This method is a significant advancement over simply discarding the unit and has saved many high-end displays from the landfill.
When Is It Time to Replace Your Monitor?
If the BIOS test confirms a hardware issue and the "Bezel Squeeze" does not work, you must perform a cost-benefit analysis. Replacing an LCD panel typically costs 80% or more of the price of a new monitor. Unless you have a very high-end professional display where a T-Con board replacement is viable, buying a new unit is usually the more practical path.
Check your manufacturer's Pixel Policy before giving up. Brands like LG, Dell, and ASUS have specific thresholds for warranty claims. Some policies require at least 3 to 5 bright subpixels or a full-length line to qualify for a replacement. If your monitor is still under its 1-year or 3-year warranty, do not attempt any DIY fixes; instead, contact support immediately with photos of the BIOS screen as evidence.
Frequently Asked Questions
Final Takeaways for Fixing Monitor Lines
- Isolate the hardware by checking if the line appears in the BIOS or on the "No Signal" screen.
- Rule out cables by swapping your HDMI or DisplayPort for a certified high-speed replacement.
- Perform a clean driver install using DDU to ensure software corruption isn't the cause.
- Lower the refresh rate to 60Hz to reduce stress on an aging T-Con board.
- Check power delivery for portable monitors, ensuring they receive at least 30W–60W from a wall outlet.
- Identify the damage type : vertical lines are often electronic, while diagonal cracks are physical and unfixable.
- Use the "Bezel Squeeze" as a last-resort DIY fix for out-of-warranty hardware.
If your diagnostic tests confirm the line is internal to the monitor and it persists across all devices, contact your manufacturer's support team to check your warranty status before attempting any physical repairs.
-
Topic: I got this vertical red line out of nowhere, is my monitor on ...https://www.reddit.com/r/pchelp/comments/17pdtd6/i_got_this_vertical_red_line_out_of_nowhere_is_my/
-
Topic: Why am I getting a single vertical line on my monitor? But ...https://www.quora.com/Why-am-I-getting-a-single-vertical-line-on-my-monitor-But-the-thing-is-that-the-line-is-visible-the-entire-time-I-am-using-my-PC-but-blue-line-doesnt-show-over-white-background-like-my-file-explorer-background
-
Topic: how to fix vertical lines on monitor | repair monitor at homehttps://www.youtube.com/watch?v=EySkjp84jVM

How to Fix Black Vertical Lines on Your Monitor and Save Your Screen
Diagnose and fix black vertical lines on your monitor or laptop. Learn to test your GPU, cables, and panel with our expert hardware guide.

How to Fix Red Lines on Your PC Screen and Identify Hardware Failure
Troubleshoot vertical and horizontal red lines on your monitor. Learn to identify GPU failure, driver issues, or hardware damage in 5 steps.

How to Diagnose and Fix Small Horizontal Lines on Your Monitor
Diagnose and fix small horizontal lines on your monitor. Learn the screenshot test, cable fixes, and how to solve power-related screen artifacts.