How to Fix Black Vertical Lines on Your Monitor and Save Your Screen
If you see a black vertical line, perform these three tests immediately to identify the culprit:
- 1. The Screenshot Test: Take a screenshot. If the line is visible in the image file, your GPU or software is failing. If the image is clean, the monitor or cable is the problem.
- 2. The OSD Test: Open your monitor's brightness menu. If the line appears over the menu, the LCD panel is physically damaged.
- 3. The Cable Swap: Replace your HDMI/DisplayPort cable. This resolves approximately 30% of all vertical line issues.
Discovering a black vertical line on your monitor can be a frustrating experience, often leading to fears of an expensive replacement. These lines, which can range from a single pixel in width to thick black bars, typically indicate a break in the communication chain between your computer's graphics processor and the physical pixels on the screen. However, not every line signifies a dead monitor.
In this guide, we will walk through a professional-grade diagnostic process used by technicians to isolate the root cause. By following these steps, you can determine if the issue is a simple software glitch, a failing cable, or a terminal hardware failure in the display panel itself.
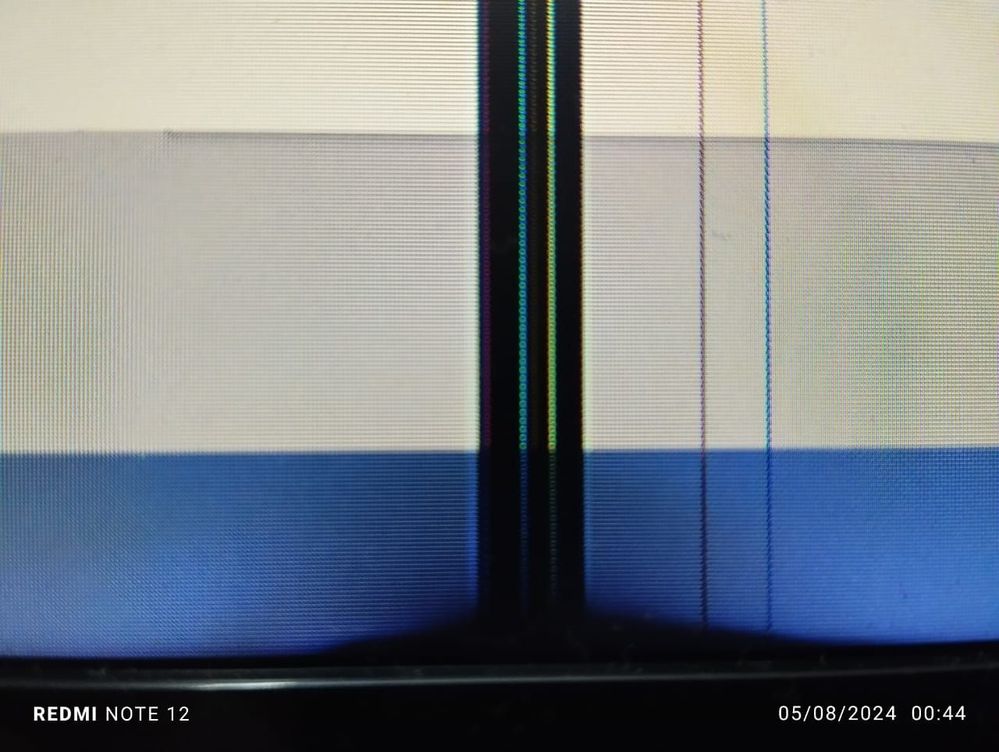
Image source: Samsung Community
Start With the 10-Second Screenshot Test
The most effective way to begin troubleshooting is to isolate the source of the image. A vertical line can be generated by your Graphics Processing Unit (GPU) before it ever reaches the monitor, or it can be a physical defect in the screen. The "Screenshot Test" is widely considered one of the best ways to make this distinction instantly.
How to Perform the Test on Windows and Mac
To perform this test, you need to capture the digital output of your system:
-
Windows Users:
Press the
Windows Key + PrintScreen. This saves a digital file of your current display to your "Screenshots" folder. -
Mac Users:
Press
Command + Shift + 3to capture the entire screen as a file on your desktop. - Open the File: Open the resulting image file on the same monitor or, better yet, view it on a different device like a smartphone or tablet.
Interpreting Your Results Correctly
According to Tom's Hardware , the logic here is binary. A screenshot captures the data exactly as it leaves the GPU's frame buffer. If the black line appears in the screenshot file when viewed on another device, the GPU is "rendering" that line. This points to a driver conflict, an overheating graphics card, or a failing GPU core.
If the screenshot is perfectly clean but you still see the line on your physical monitor, the GPU is sending a healthy signal. The failure is occurring later in the chain—either in the video cable, the monitor's internal circuitry, or the LCD panel itself. This simple test saves hours of unnecessary software troubleshooting if the problem is purely mechanical.
Check the On-Screen Display Menu for Internal Errors
If the screenshot test confirms the issue is within the monitor hardware, the next step is to determine if the failure is in the "brain" of the monitor or the "face" (the panel). Every modern monitor has an On-Screen Display (OSD) menu—the built-in interface used to adjust brightness, contrast, and input sources.
Press the physical buttons on your monitor to bring up this menu. Observe the black line carefully. Does the line appear behind the menu or on top of it? If the line persists and covers the OSD menu, the physical pixels in that column are no longer receiving power or data. This is a definitive marker of hardware failure within the LCD panel or the T-Con (Timing Controller) board, as noted by KTC Play .
Why Your Refresh Rate Might Be Causing Lines
In recent years, high-refresh-rate monitors (144Hz, 240Hz, and beyond) have become standard for gaming and professional work. However, these higher frequencies place a significant strain on the bandwidth of your video cable and the monitor's internal processing hardware. A black line that flickers or only appears during high-motion scenes may actually be a bandwidth bottleneck.
Testing Lower Frequencies to Stabilize the Image
If you are running a monitor at 144Hz or higher, try lowering the refresh rate to a standard 60Hz. In Windows, you can find this under Settings > System > Display > Advanced Display . If the lines disappear at 60Hz, it indicates that your current cable is likely a "Standard" grade cable struggling to maintain the data throughput required for high-speed signals.
High-quality cables are essential for modern displays. A "cheap" HDMI cable might work for a 1080p 60Hz office monitor but will often produce artifacts, "ghost" lines, or total signal dropouts when pushed to 4K or high refresh rates. Switching to a VESA-certified "Premium High Speed" or "Ultra High Speed" cable is a top-rated solution for these types of intermittent vertical lines.
How to Rule Out Cable and Port Failure
Before assuming your monitor is broken, you must rule out the most common point of failure: the physical connection. Cables are subject to "cable strain," where the weight of the cable pulling down on the connector eventually damages the internal copper pins.
| Symptom | Likely Culprit | Recommended Action |
|---|---|---|
| Line flickers when cable is touched | Loose Connector / Damaged Port | Reseat cable or try a different port |
| Line appears only at high resolutions | Insufficient Cable Bandwidth | Upgrade to VESA-certified cable |
| Line is static and never changes | LCD Panel / Tab Bonding | Check warranty or professional repair |
| Line appears in screenshots | GPU / Driver Software | Reinstall drivers using DDU |
Inspect the ends of your HDMI or DisplayPort cable for bent pins. Even a single misaligned pin can prevent the "clock signal" from reaching the monitor correctly, resulting in vertical stripes. Furthermore, try plugging the cable into a different port on your GPU. Graphics cards often have multiple outputs; if the line disappears when you move from DisplayPort 1 to DisplayPort 2, the issue is a failing output port on your computer, not the monitor.
Troubleshooting Portable Monitors and Power Delivery
Portable monitors have unique power requirements that often lead to visual artifacts. Most portable displays are powered via a single USB-C cable that carries both data and electricity. If your laptop is running on battery or if the USB port is not rated for high power delivery (PD), the monitor may not receive the stable voltage it needs to drive the LCD pixels.
According to manufacturer data from KTC Play , many portable monitors require between 30W and 60W of dedicated power to maintain signal integrity. If you see vertical lines on a portable screen, connect a dedicated wall charger directly to the monitor's secondary USB-C port. If the lines vanish, the issue was "under-volting," which can mimic the appearance of a cracked or failing panel.
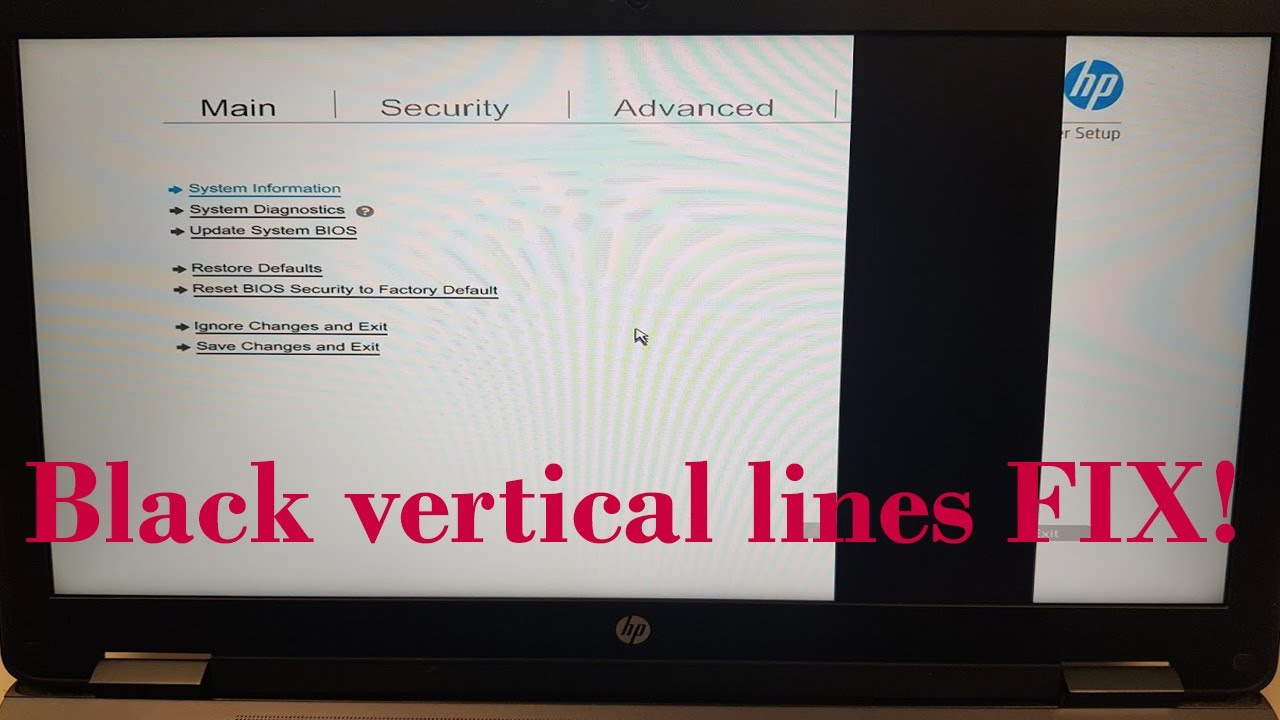
Image source: YouTube
Fixes for Vertical Lines on Laptop Screens
Laptops present a specific challenge because the connection between the motherboard and the screen is a delicate ribbon cable (often called an EDP or LVDS cable) that must pass through the mechanical hinge. Over years of opening and closing the lid, this cable can become frayed, pinched, or slightly unseated.
The Lid Angle Test: Slowly move your laptop screen back and forth through its full range of motion. If the black line flickers, changes color, or disappears at a certain angle, you have confirmed that the LCD panel itself is likely healthy, but the internal ribbon cable is damaged. This is a common issue reported in enthusiast forums like the ASUS ROG Forum .
While replacing an internal laptop cable requires significant technical skill, it is a much cheaper fix than replacing the entire display assembly. If the line remains static regardless of the lid's position, you should plug the laptop into an external TV or monitor. If the external screen is clear, the internal laptop panel has likely suffered a hardware failure.
Advanced Physical Fixes for Tab Bonding Issues
If you have ruled out cables, drivers, and power, the issue is likely "Tab Bonding" failure. Inside your monitor, the glass LCD panel is connected to the driver circuitry by thin, flexible ribbon cables called "tabs." These tabs are glued to the glass using a special conductive adhesive. Over time, heat expansion and contraction can cause these connections to loosen, resulting in a single-pixel vertical line where the connection has failed.
Technicians at iFixit suggest a "Safe Pressure" technique to diagnose tab bonding. Using a soft microfiber cloth, apply very gentle pressure to the plastic bezel (the frame) at the very top or bottom of where the line appears. Do not press the screen itself. If the line flickers or disappears when you squeeze the frame, you have confirmed a loose tab bond. Some users have found success by placing a small, thin piece of non-conductive rubber or foam inside the bezel to maintain that pressure, though this requires disassembling the monitor casing.
Software and Driver Solutions That Actually Work
While most vertical lines are hardware-related, software glitches can occasionally manifest as pixel-perfect vertical artifacts. This is particularly true if you have recently updated your operating system or graphics drivers.
- Clean Driver Installation: Use a tool like DDU (Display Driver Uninstaller) to completely wipe your existing NVIDIA, AMD, or Intel drivers in Safe Mode. Then, install the latest "Studio" or "WHQL" certified driver from the manufacturer's website.
- The "Two Displays" Bug: In rare cases, Windows may incorrectly calculate display spanning, leaving a 1-pixel black gap between virtual desktops that looks like a hardware line. Resetting your display resolution or toggling "Extend these displays" off and on can resolve this.
- Pixel Fixer Tools: If the line is a bright color (stuck) rather than pure black (dead), you can use web-based tools like JScreenFix. These tools cycle colors at high speeds in an attempt to "unstick" the transistors in that column. While rarely effective for pure black lines, it is a harmless first step.
When to Give Up and Use Your Warranty
There comes a point where a vertical line indicates a terminal failure of the Timing Controller (T-Con) board. The T-Con board is the "brain" that translates the video signal into the specific voltages needed for every row and column of pixels. If this board fails, it often produces a "curtain" of vertical lines or a solid black bar that covers a large portion of the screen.
Repairing a T-Con board or replacing a panel is often more expensive than buying a new monitor, especially for budget-tier displays. However, before you recycle the unit, check your manufacturer's warranty. Many "Premium" panel guarantees from brands like Dell or LG cover even a single vertical line if the monitor is within its first 3 years of service. Budget brands may require a minimum of 3 to 5 "dead" columns before they will authorize a replacement.
Frequently Asked Questions
Can a black vertical line on a monitor be fixed without replacing the screen?
Yes, but only if the cause is external to the LCD panel. If the line is caused by a faulty HDMI/DisplayPort cable, an outdated graphics driver, or insufficient power delivery (common in portable monitors), it can be fixed easily. However, if the line is caused by a cracked panel or a failed internal tab bond, a physical screen replacement is usually the only permanent solution.
Will a vertical line on my monitor get worse over time?
Typically, yes. Because vertical lines are often caused by failing adhesive or heat-damaged components, the continued heat generated by the monitor during use will likely cause the connection to degrade further. What starts as a single-pixel line can eventually expand into a thick black bar or lead to total panel failure.
Does HDMI cable damage cause vertical black lines?
Yes. While HDMI issues usually manifest as "snow," flickering, or total signal loss, a damaged pin or poor shielding can cause specific data columns to fail. This is especially common when using long cables (over 15 feet) that are not active or high-speed rated. Always test with a known-working, short cable to rule this out.
Why does the line disappear when I press the bottom of the screen?
This is a classic symptom of a "Tab Bonding" issue. The ribbon cable that carries data to that specific column of pixels has become slightly detached from the glass. By pressing the frame, you are temporarily reseating that connection. While this confirms the panel is the problem, it is rarely a permanent fix without professional intervention.
Is a single vertical line covered under monitor warranty?
This depends entirely on the manufacturer's "Pixel Policy." Most premium manufacturers (Dell UltraSharp, LG UltraGear, Samsung Odyssey) have a "Zero Bright Pixel" or "Limited Dead Pixel" warranty that covers vertical lines within the first 1-3 years. Budget monitors often have a higher threshold, requiring multiple lines before a replacement is granted. Always check your specific model's warranty terms.
Final Summary and Next Steps
Fixing a black vertical line requires a systematic approach to isolate the failure point. Before you consider the monitor a total loss, remember these key takeaways:
- 1. Isolate the GPU: Use the Screenshot Test to ensure your graphics card isn't the source of the artifact.
- 2. Check the OSD: If the line appears over the monitor's built-in menu , the panel is physically failing.
- 3. Swap the Cable: Use a VESA-certified cable and try different ports to rule out connection issues.
- 4. Adjust Refresh Rates: Lowering your Hz settings can sometimes stabilize a failing timing controller.
- 5. Power Matters: For portable monitors, always test with a dedicated wall power supply .
- 6. Laptop Hinges: If the line flickers when moving the lid, the internal EDP ribbon cable is likely the culprit.
If you have performed all these steps and the line remains, your next move should be to contact the manufacturer for a warranty claim or look into a professional recycling center for your display.
-
Topic: What is this black line on my monitor : r/pchelphttps://www.reddit.com/r/pchelp/comments/1fvfrly/what_is_this_black_line_on_my_monitor/
-
Topic: SOLVED: Samsung Monitor with black vertical line - Displayhttps://www.ifixit.com/Answers/View/584925/Samsung+Monitor+with+black+vertical+line
-
Topic: Thin black horizontal lines flickering on monitor [SOLVED]https://forums.tomshardware.com/threads/thin-black-horizontal-lines-flickering-on-monitor-solved.1852308/

How to Diagnose and Fix a Vertical Line on Your Monitor Screen
Troubleshoot vertical lines on your monitor. Learn to fix hardware issues, driver glitches, and power problems with our expert diagnostic guide.

How to Fix Red Lines on Your PC Screen and Identify Hardware Failure
Troubleshoot vertical and horizontal red lines on your monitor. Learn to identify GPU failure, driver issues, or hardware damage in 5 steps.
How to Fix Horizontal Lines on Your Monitor and Save Your Screen
Learn how to diagnose and fix horizontal lines on your monitor. Test your GPU, cables, and refresh rates to see if your screen is dying or fixable.