How to Fix Red Lines on Your PC Screen and Identify Hardware Failure
Red lines on a PC screen typically indicate a hardware communication failure between the graphics card and the display panel. If the lines are solid and static, the issue is likely a failing LCD panel or a loose internal ribbon cable. If the lines flicker, move, or appear as "sparkles," the problem usually stems from a faulty HDMI/DisplayPort cable or a dying GPU. To instantly isolate the cause, enter your BIOS/UEFI menu : if the lines persist there, the problem is hardware-based; if they disappear, it is a Windows driver issue.
Identifying the Cause of Red Lines Immediately
Discovering bright red lines streaking across your monitor can be an alarming experience, often sparking fears of a total system collapse. However, these visual artifacts are specific symptoms that point toward a limited number of culprits: signal interference, driver corruption, or physical panel degradation. Understanding the nature of the line is the first step toward a resolution.
According to community data from iFixit , solid vertical lines that do not change regardless of what is on the screen are frequently tied to "TAB bonding" issues—where the ribbon cables connecting the LCD to its controller board begin to lift. Conversely, horizontal lines or flickering artifacts often suggest a failure in the T-Con board or the Graphics Processing Unit (GPU) memory (VRAM).
Before assuming your hardware is beyond repair, it is vital to distinguish between a "stuck pixel" and a "line failure." A stuck pixel is a single point of light, whereas a red line indicates an entire row or column of sub-pixels has lost its ability to receive proper color data. While software tools can sometimes "massage" a single pixel back to life, they are generally ineffective for full-line failures, which require physical or signal-based interventions.
Is It Your Monitor or Your PC? (The BIOS Test)
The most effective way to narrow down the source of the problem is the BIOS/UEFI Isolation Test . This method bypasses the Windows operating system and its associated display drivers, allowing you to see the raw output of your hardware.
- Shut down your PC completely. Do not just use "Sleep" or "Hibernate."
- Power the PC back on and immediately begin tapping the BIOS key. This is typically F2, F12, Del, or Esc , depending on your motherboard manufacturer (e.g., ASUS, Dell, HP).
- Observe the screen carefully while in the BIOS menu. Since the BIOS uses basic generic display instructions, your high-performance NVIDIA or AMD drivers are not active yet.
The logic here is binary: if the red lines are visible in the BIOS, the Windows driver is not the cause. This confirms the issue is 100% hardware-related , involving the monitor, the cable, or the GPU's physical output. If the BIOS screen is perfectly clear, you are dealing with a software or driver conflict within Windows, which is significantly easier and cheaper to fix.
How to Fix Software-Related Red Lines in Windows
If your BIOS test proved that the lines only appear once Windows loads, you are in luck. This suggests that the communication between your OS and the hardware has become corrupted. This is a common occurrence following a Windows Update or a GPU driver crash.
Uninstall and Reinstall Your Display Drivers
Simply updating a driver is often insufficient because corrupted registry entries from the old driver can persist. A clean reinstallation is a highly recommended approach. As noted in Microsoft Q&A , using the Device Manager to completely remove the device is the standard protocol.
- Right-click the Start button and select Device Manager .
- Expand the Display adapters section.
- Right-click your GPU (e.g., NVIDIA GeForce or AMD Radeon) and select Uninstall device .
- Check the box that says "Attempt to remove the driver for this device" and click Uninstall.
- Restart your PC. Windows will automatically detect the hardware and install a fresh, generic driver, which often resolves the artifacting.
Adjust Your Refresh Rate and Resolution
High refresh rates (144Hz, 240Hz) place significant strain on display cables. If a cable is slightly damaged or of lower quality, it may struggle to maintain the bandwidth required, resulting in "stuck" red lines or flickering. Try lowering your refresh rate to 60Hz via Settings > System > Display > Advanced Display to see if the lines disappear. If they do, your cable is likely the bottleneck and needs replacement with a high-bandwidth certified version.
Check Windows 11 Scaling Settings
In recent months, users on Dell Support forums have noted that Windows 11's "Display Scaling" (DPI settings) can occasionally cause visual artifacts on certain high-resolution panels. If you are using a scaling factor other than 100%, try reverting to the default setting to ensure the OS isn't miscalculating the pixel grid alignment.
Troubleshooting Hardware and Cable Connections
When the BIOS test confirms a hardware fault, you must isolate which specific component has failed. Do not assume the monitor is dead until you have tested the signal chain.
The Source Swap Method
Connect your monitor to a completely different device, such as a gaming console, a streaming stick, or a different laptop. If the red lines persist on the new source, the monitor's internal panel is the culprit. If the lines disappear, the issue lies with your PC's GPU or the cable you were previously using.
Port and Cable Elimination
Cables are the most frequent point of failure. A single bent pin or a frayed internal wire can cause "channel loss," where the red sub-pixels receive a constant "on" signal.
Switch from HDMI to DisplayPort (or vice versa) if your monitor supports both. Furthermore, if your CPU has integrated graphics, move the cable from the dedicated GPU port to the motherboard's display port. If the lines vanish when using integrated graphics, your
dedicated GPU is likely failing
or overheating.
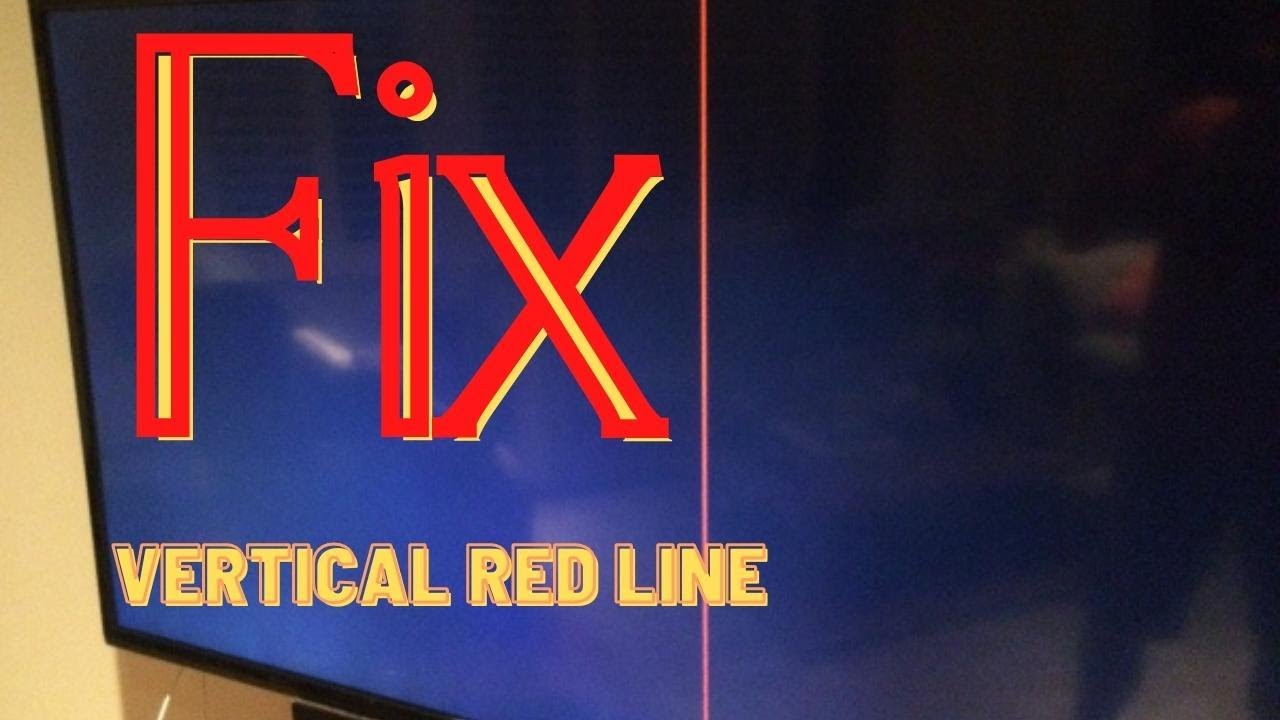
Image source: YouTube
Physical Fixes for Vertical Red Lines on the Display
If you have determined the monitor itself is at fault, there are a few "last resort" physical diagnostics you can perform before sending it to a recycling center.
The Bezel Squeeze Test for TAB Bonding Issues
Vertical lines are often caused by a failure in the "Tape Automated Bonding" (TAB). These are the delicate ribbon cables that connect the glass of the LCD to the driver electronics. Over time, heat causes the adhesive to weaken.
Try applying
very gentle pressure
to the plastic frame (bezel) at the very top or bottom of where the red line terminates. If the line flickers, changes color, or disappears momentarily, you have confirmed a TAB bonding failure. While not a permanent fix, some users have found success by placing a small piece of non-conductive foam inside the bezel to maintain pressure on that specific spot.
Running the Monitor BIST (Built-in Self Test)
Many professional-grade monitors from Dell, ASUS, and HP include a Built-in Self Test (BIST). This allows the monitor to run a series of solid color screens (Red, Green, Blue, Black, White) without being connected to any computer.
To run a BIST on a Dell monitor, for example, you typically disconnect all video cables and hold the first and fourth buttons (from the left) simultaneously for two seconds. If the red line appears on these internal test screens, the panel is physically damaged and cannot be fixed via software.
Comparing Vertical vs. Horizontal Red Lines
The orientation and behavior of the lines provide a roadmap to the failing component. Use the following table to categorize your specific issue.
| Symptom | Likely Cause | Diagnostic Step |
|---|---|---|
| Solid Vertical Line | LCD Panel / TAB Bonding failure | Bezel Squeeze Test |
| Horizontal Lines | T-Con Board or GPU VRAM failure | Test with a different GPU |
| Flickering/Scattered Lines | Loose Cable or EMI Interference | Replace HDMI/DisplayPort cable |
| Red "Sparkles" | Signal degradation (Cable too long) | Use a shorter, shielded cable |
| Lines only when warm | Thermal expansion of loose parts | Improve monitor ventilation |
When to Repair vs. When to Replace Your Monitor
Deciding whether to fix a monitor or buy a new one often comes down to the "80% Rule." If the cost of a replacement LCD panel plus labor exceeds 80% of the price of a new, comparable monitor, replacement is the more logical choice. LCD panels are the most expensive component of the display, and they are rarely sold to consumers at reasonable prices.
"Most modern monitors are designed as 'sealed units.' While the electronics can sometimes be repaired by a specialist, a cracked or failing LCD substrate is generally considered a total loss for the average consumer."
However, do not discard your monitor without checking the Warranty Secret . Many manufacturers like Dell and HP track warranties via the Serial Number (S/N) or Service Tag located on a sticker on the back of the device. You often do not need the original paper receipt to claim a replacement if the unit is still within its 3-year window. Always check the manufacturer's support portal with your S/N before assuming you have to pay for a new one.
Frequently Asked Questions
Can a loose HDMI cable cause red lines?
Yes, signal interference or a poorly seated cable is a frequent cause of visual artifacts. Because HDMI and DisplayPort transmit data digitally, a weak connection can result in "bit errors," where the red sub-pixels are incorrectly triggered. This often manifests as flickering red lines or tiny red dots (sparkles) across the screen. Always try a different, high-quality cable before assuming your monitor is broken.
Are red lines a sign of a dying GPU?
They can be, but the pattern matters. If the red lines are horizontal, flickering, or accompanied by system crashes (BSODs), it is a strong indicator that the GPU's video memory (VRAM) is failing or overheating. If the lines are vertical and perfectly static, the issue is almost always the monitor's internal LCD panel rather than the graphics card itself.
Does PixelHealer or JScreenFix fix red lines?
Generally, no. Tools like PixelHealer are designed to "unstick" a single pixel by rapidly cycling colors. A red line indicates a failure of an entire row or column of pixels, which is usually a hardware connection issue (like a failed driver IC or ribbon cable). While these tools are harmless to try, they rarely resolve full-line artifacts.
Why do red lines appear only after the monitor warms up?
This is due to thermal expansion. As the monitor operates, internal components generate heat, causing materials to expand slightly. If there is a loose connection or a failing solder joint on the T-Con board or TAB bonding, the expansion can break the electrical contact, causing the line to appear. Conversely, some lines disappear as the monitor warms up and the connection is pressed back into place.
Is it safe to use a monitor with red lines?
It is physically safe for the user, as there is no risk of fire or explosion from a failing LCD column. However, it is a sign of progressing hardware failure. Over time, the single line may expand into a block of lines, or the entire panel may eventually fail to initialize. It is best to back up your work and begin looking for a replacement or warranty options.
Key Takeaways for Fixing Red Lines
Dealing with screen artifacts requires a logical, step-by-step elimination process to avoid unnecessary costs.
- Perform the BIOS test to instantly determine if the fault is hardware or software.
- Clean-install GPU drivers using the Device Manager to rule out Windows corruption.
- Swap your cables and test different ports (HDMI vs. DisplayPort) to rule out signal loss.
- Use the "Bezel Squeeze" to identify physical TAB bonding failures in the panel.
- Verify warranty status via the Serial Number before considering a replacement.
- Categorize the lines: Vertical usually means panel failure; horizontal often means GPU or T-Con failure.
If your monitor fails the BIOS test and shows lines on multiple devices, it is likely a hardware failure that ranks among the most common reasons for display replacement.

How to Diagnose and Fix a Vertical Line on Your Monitor Screen
Troubleshoot vertical lines on your monitor. Learn to fix hardware issues, driver glitches, and power problems with our expert diagnostic guide.


How to Fix Black Vertical Lines on Your Monitor and Save Your Screen
Diagnose and fix black vertical lines on your monitor or laptop. Learn to test your GPU, cables, and panel with our expert hardware guide.

How to Fix Horizontal Lines on Your Monitor and Save Your Screen
Learn how to diagnose and fix horizontal lines on your monitor. Test your GPU, cables, and refresh rates to see if your screen is dying or fixable.