How to Diagnose and Fix Small Horizontal Lines on Your Monitor
If you see horizontal lines, perform the Screenshot Test immediately. Press Print Screen and view the image on another device. If the lines are in the screenshot, your Graphics Card (GPU) or drivers are failing. If the screenshot is clean, the issue lies in your monitor hardware or video cable . Most users find that swapping to a VESA-certified DisplayPort or HDMI cable resolves the issue without needing a new monitor.
Discovering small horizontal lines across your monitor can be a distressing experience. Whether they are thin black flickers, static colored stripes, or a persistent "crawling" pattern, these artifacts usually signal a breakdown in the communication between your computer and the display panel. Before you assume your monitor is destined for the recycling center, it is essential to follow a structured diagnostic path. Many of these issues are caused by simple environmental factors or "marginal" cables that fail to handle high-bandwidth signals.
Using the Screenshot Test to Identify GPU or Software Faults
The first step in any display troubleshooting process is to determine where the image is breaking down. The "Screenshot Test" is widely considered one of the most reliable ways to isolate the culprit. This test works because a screenshot captures the image as it is rendered by the graphics card, before it ever travels through the cable to the monitor.
According to Tom's Hardware community experts , the results of this test are binary. If the horizontal lines appear in the saved image file when you view it on a different device (like your phone or a laptop), the problem is internal to your PC. This typically points to a failing GPU, unstable VRAM overclocking, or corrupted display drivers. If the screenshot looks perfectly clean, you have successfully ruled out the computer's software and internal hardware, meaning the fault lies in the "Signal Path"—the cable, the ports, or the monitor's internal panel.
Running the On-Screen Display Test for Internal Hardware Checks
If the screenshot test was clean, the next step is to determine if the monitor itself is failing or if the video cable is simply providing a bad signal. To do this, you use the monitor’s On-Screen Display (OSD) menu. This is the menu you use to adjust brightness, contrast, and input sources.
Disconnect the HDMI or DisplayPort cable from the back of the monitor so that it displays a "No Signal" message. Then, open the monitor's built-in menu. If the horizontal lines are still visible over the menu or the "No Signal" box, the monitor's internal hardware—specifically the T-CON board or the LCD panel itself—is likely damaged. As noted by KTC Play support documentation , lines that persist without any input signal are a clear indicator of internal component degradation.
Why Video Cables Are Often the Primary Cause of Screen Artifacts
It is a common misconception that digital cables (HDMI and DisplayPort) either work perfectly or don't work at all. In reality, high-resolution (1440p/4K) and high-refresh-rate (144Hz+) monitors require immense bandwidth. A "marginal" cable might work fine for basic web browsing but produce horizontal "sparkles" or lines when the GPU pushes a high-performance signal.
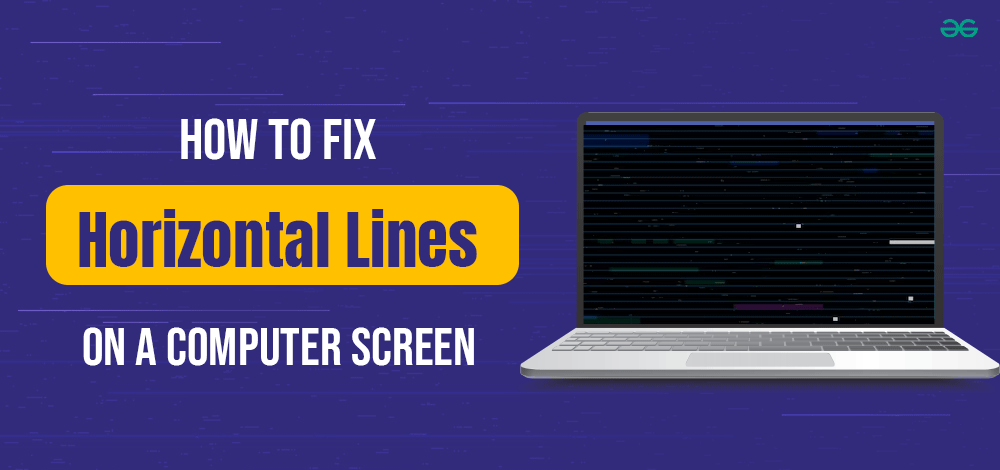
Image source: GeeksforGeeks
When inspecting your cables, look for the following:
- Bent Pins: Check the connectors for any pins that are pushed in or crooked. This is especially common with older VGA and DVI cables but can happen with HDMI.
- Bandwidth Limitations: Ensure your cable is rated for your monitor's specs. For example, a 4K 144Hz monitor requires a DisplayPort 1.4 or HDMI 2.1 cable. Using an older cable can cause synchronization errors that manifest as horizontal lines.
- VESA Certification: Many "cheap" cables bundled with monitors are not VESA-certified. Investing in a high-quality, certified cable sets a high standard for signal integrity and often resolves flickering issues immediately.
Performing a Clean Graphics Driver Reinstall Using the DDU Method
If your screenshot test showed lines, your drivers are likely the cause. However, simply clicking "Update Driver" in Windows Device Manager is often insufficient because it leaves behind corrupted registry keys and old files. To truly fix software-based artifacts, you should use the Display Driver Uninstaller (DDU) method.
- Download DDU: Obtain the latest version of Display Driver Uninstaller from a reputable source like Guru3D.
- Boot into Safe Mode: This prevents Windows from loading the active driver while you are trying to delete it.
- Run the Clean: Select your GPU brand (NVIDIA, AMD, or Intel) and choose "Clean and Restart."
- Install Fresh Drivers: Once the PC restarts, install the latest driver package downloaded directly from the manufacturer's website.
This "clean slate" approach is highly recommended by technical forums as it rules out software conflicts that a standard update might miss. If the lines persist after a DDU wipe, the issue is likely a physical hardware failure in the GPU's VRAM.
How Refresh Rate Adjustments Can Resolve Bandwidth Related Lines
Sometimes, horizontal lines are a symptom of a monitor's internal components struggling to keep up with high refresh rates. As a monitor ages, its capacitors and logic boards may lose the ability to process high-frequency signals stably. This often results in the "60Hz Crawl," where faint lines move slowly up or down the screen.
To test this, go to your Display Settings > Advanced Display and lower the refresh rate. If you are running at 144Hz, try dropping to 120Hz or 60Hz. If the lines disappear at lower frequencies, your monitor or cable is likely suffering from bandwidth exhaustion. While this isn't a "fix" in the sense of repairing the hardware, it allows you to continue using the display stably while you plan for a replacement.
Solving Power Starvation Issues in USB-C Portable Monitors
Portable monitors have become a top choice for remote workers, but they introduce a unique problem: power starvation. Most portable monitors draw power and data through a single USB-C cable connected to a laptop. If the laptop's USB port cannot provide enough wattage, the monitor's panel may flicker or show horizontal artifacts that look like a broken screen.
| Monitor Size | Typical Power Draw | Recommended Power Source |
|---|---|---|
| 13.3" - 14" | 10W - 15W | Standard Laptop USB-C Port |
| 15.6" | 15W - 25W | High-Power USB-C (PD) or Wall Adapter |
| 17.3"+ | 30W - 60W | Dedicated Wall Adapter (Mandatory) |
If you see lines on a portable display, try connecting a dedicated power brick (like a phone charger) to the monitor's second USB-C port. Providing a stable, independent power source often clears up artifacts caused by the laptop's fluctuating bus power.
Environmental Factors and Electrical Interference Affecting Your Display
Your monitor does not exist in a vacuum. It is susceptible to electromagnetic interference (EMI) from the world around it. One of the most overlooked causes of thin, flickering black lines is a mobile phone placed too close to the video cable. 5G and LTE signals can induce "noise" in poorly shielded cables, resulting in visual artifacts.
The "5-Blink" Hard Reset
Static electricity can build up in a monitor's capacitors over time, leading to logic errors. A "deep reset" can often clear these errors. Unplug the monitor from the wall, then hold the power button down for 30 to 60 seconds. This drains the residual charge. Some technicians recommend holding the button while plugging it back in until the power LED blinks five times, which triggers a factory reset of the internal firmware.
Electrical Grounding Issues
If your home has poor electrical grounding, "dirty power" can create interference on your screen. This is often visible as horizontal lines that appear when another appliance (like a refrigerator or vacuum) turns on. Using a high-quality power strip with EMI/RFI filtering can significantly improve display stability in these environments.
Understanding Internal Component Failure and When to Seek Professional Repair
If you have tried different cables, performed a DDU wipe, and the lines still appear in the OSD menu, you are likely dealing with internal component failure. There are three common culprits inside the monitor casing:
The Timing Controller (T-CON) board translates the GPU signal into instructions for the LCD pixels. If this board fails, you will see consistent horizontal or vertical stripes.
Internal ribbon cables connect the logic board to the panel. Heat can cause the adhesive on these cables to fail, leading to loose connections and horizontal lines.
Surface-mount devices (SMDs) like capacitors can bulge or leak. This is a significant advancement in monitor death—once these fail, the monitor usually requires professional soldering to fix.
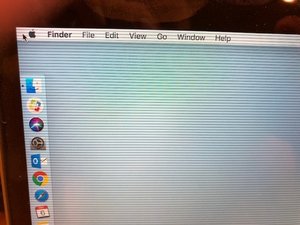
Image source: iFixit
Deciding Between Monitor Repair and Purchasing a New Display
When faced with a failing panel, you must perform a cost-benefit analysis. Replacing a T-CON board can cost between $50 and $100, which is a top-tier option for an expensive professional monitor. However, if the LCD panel itself is damaged (often indicated by lines that change when you gently press the bezel), the repair cost usually exceeds the price of a new unit.
Before giving up, check your warranty. Manufacturers like Dell, LG, and Samsung have specific "pixel and line" policies. Even if your monitor is out of its standard one-year warranty, some high-end models have three-year coverage for panel defects. If you must replace the unit, ensure you recycle the old one at a certified e-waste facility to prevent hazardous materials from entering landfills.
Summary Checklist for Troubleshooting Monitor Artifacts
Key Takeaways for Fixing Horizontal Lines
Troubleshooting monitor lines is a process of elimination. By following these steps, you can determine if the fix is free or if a replacement is necessary.
- Perform the Screenshot Test: If lines appear in the capture, focus on your GPU and drivers .
- Check the OSD Menu: If lines appear over the monitor's internal menu, the panel or T-CON board is failing.
- Swap the Cable: Always test with a VESA-certified HDMI or DisplayPort cable to rule out bandwidth issues.
- Power Your Portable: Use an external wall adapter for portable monitors to prevent power starvation artifacts.
- Clean Install Drivers: Use DDU in Safe Mode to ensure no software corruption remains.
- Lower the Refresh Rate: Dropping from 144Hz to 60Hz can temporarily stabilize a failing component .
- Clear Static Charge: Use the 30-second power button hold to perform a deep hardware reset.
If the lines persist across multiple cables and appear in the monitor's OSD menu, the internal hardware has likely reached the end of its functional lifespan.
Frequently Asked Questions
- Can a loose HDMI cable cause horizontal lines?
- Yes, a loose or damaged HDMI cable is a common cause of horizontal artifacts. Digital signals require a perfect connection; if the pins aren't making full contact, you may see "sparkles" or thin horizontal lines. Always ensure the cable is seated firmly and try a different port if available.
- Why do lines appear on my monitor only when it is cold?
- This is usually due to thermal expansion. As the monitor's internal components (like the ribbon cables or T-CON board) heat up, the materials expand and make better electrical contact. If the lines disappear after 10-15 minutes of use, it is a sign that an internal connection is beginning to fail.
- Will horizontal lines get worse over time?
- In most cases, yes. If the lines are caused by failing capacitors or a degrading LCD panel, the damage will typically spread as the components continue to heat up and wear down. It is best to back up your work and prepare for a replacement if the lines are hardware-based.
- Can a GPU overclock cause horizontal lines?
- Absolutely. When you push your GPU's video memory (VRAM) too far, it can produce "artifacts," which often look like random horizontal blocks or lines. If you have recently overclocked your system, revert to factory settings to see if the lines disappear.
- Does G-Sync or FreeSync affect horizontal lines?
- While rare, synchronization technologies can sometimes cause flickering or horizontal "tearing" if the frame rate fluctuates wildly. Disabling G-Sync or FreeSync in your GPU control panel can help you rule out a software-based synchronization glitch.
- Is it safe to "massage" the screen to fix lines?
- Some users suggest gently pressing the bezel where the lines originate. While this can sometimes temporarily reconnect a loose internal ribbon cable, it is generally a bad idea. Applying pressure to an LCD panel can cause permanent pixel damage or cracks, turning a small line issue into a total panel failure.
-
Topic: Weird horizontal lines on my monitor. : r/computershttps://www.reddit.com/r/computers/comments/1lozftw/weird_horizontal_lines_on_my_monitor/
-
Topic: Monitor horizontal issue - Fixed!https://www.youtube.com/watch?v=bD9IB5rplF8
-
Topic: Weird, subtle horizontal lines on monitorhttps://learn.microsoft.com/en-us/answers/questions/4352559/weird-subtle-horizontal-lines-on-monitor

How to Fix Horizontal Lines on Your Monitor and Save Your Screen
Learn how to diagnose and fix horizontal lines on your monitor. Test your GPU, cables, and refresh rates to see if your screen is dying or fixable.


How to Diagnose and Fix a Vertical Line on Your Monitor Screen
Troubleshoot vertical lines on your monitor. Learn to fix hardware issues, driver glitches, and power problems with our expert diagnostic guide.

How to Fix a Faint White Line on Your Monitor and Tell if It Is Permanent
Diagnose and fix faint white lines on your monitor. Use the screenshot test and hardware fixes to identify GPU, cable, or panel issues.